Spring 2022 Infrastructure Improvements

We Had To Start Somewhere

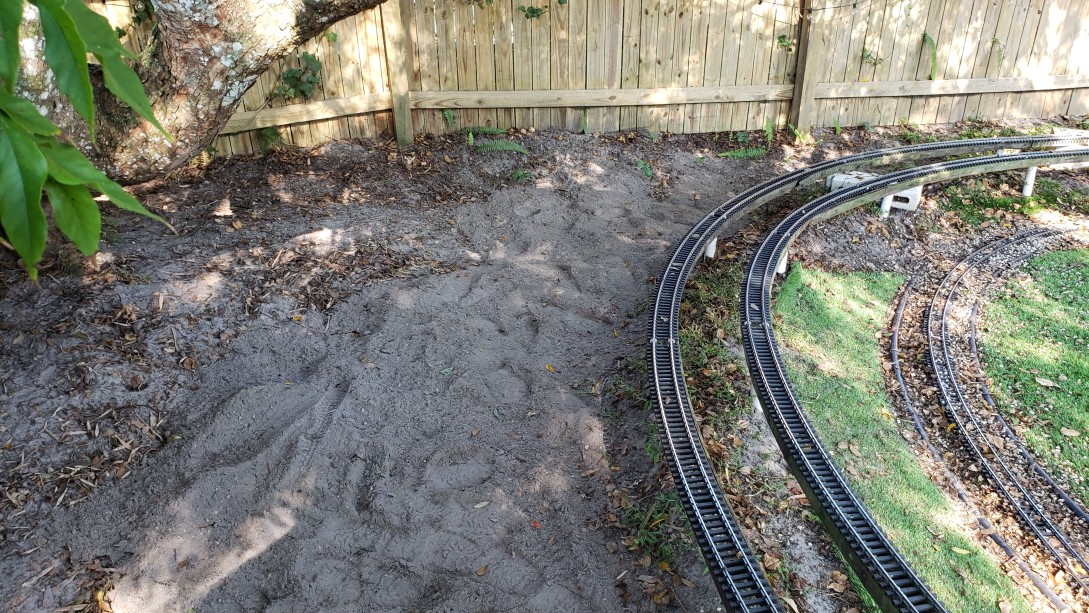
So… Where do I start? It’s been a couple months now since yet another wooden stringer has rotted to the point where the pups have totally destroyed it. Not one. Not two. Not three. Five! Had we known then… This is the third go round to repair and replace the rotted wooden stringers we use for roadbed. Here are some shots of before and after repair, trying to avoid the inevitable state we’re in now.

Broken
Patched


Although we started treating all the slats on the new stringers with a rot preventative, it’s too late for all those original stringers, only three to four years old now. It’s been a LOT of work just to splice new sections in place of the bad and broken ones, let alone digging up and replacing entire stringers the first few go rounds.

When we researched our roadbed choices before we laid the first piece of track, our choices fell into two “camps”: Wood and Concrete. The biggest advantage to using concrete is its resistance to frost heave, something we don’t have to worry about here in central Florida, so we pressed ahead using wood. No mention of rot or annual maintenance and replacement to be found. We had to start somewhere, but had we known then…

While our situation doesn’t seem unique, we’ve not found any mention of “puppy proofing” against large scale bombardment by dogs.

Other Issues

Another place where the stringers have rotted away is the station platform along the edge of the patio. When we first put in the station siding along the planters, the top of the track sat about 4″ or so above the ground, but that’s the low spot. The patio slopes away from the garage for proper drainage, leaving a bit of a swale between it and the raised bed planters. We filled it with gravel, but we were constantly having to sweep the gravel off the patio and back into the swale.

We were already thinking brick arches along the edge, so a row of fired clay bricks with the three hollows were stacked along the edge of the patio to “simulate” brick arches, and rather poorly at that, but it solved our gravel problem. So the idea was always to have some sort of arched structures, culverts, or the like. After a number of failed attempts at keeping plants growing, a station, and platform roof structure, we eventually removed the planters.

That left us with just the station siding, station platform (4x8x16 concrete blocks), and those silly looking bricks.

Silly Looking Bricks


Concrete Roadbed

We’ve re-evaluated our choice of wooden stringers as roadbed… Understatement? Probably. Short of another journey into decades old forum posts, concrete roadbed is the only other choice we’ve found. Now the challenge is how to make that work without loads and loads of dirt beneath to hold up the tracks on the grades. And how to incorporate dual mainlines. And how to handle curves. And a few other issues that remain undiscovered.

The short version is there are just as many unknowns with the concrete approach as we faced when we first started with wood. That initial arched culvert back in January didn’t address the idea of roadbed. In fact, it didn’t even address the idea of a casting molds. The main focus was a modular design that fit the build volume of the 3D printer. Modules would be assembled by fitting arch sections together with joiner sections using the liquid cement technique that works well for PLA.

But I tried to do too much, like adding detail inside the underside of the arch, where it will be at most 2″ off the ground and no one will see it. Working out the dimensions using a piece of 3″ PVC pipe to guide the dimensions meant going back to the drawing board to fit the design to real world constraints and deviating from the rivet counting details based on the Pennsylvania Railroad standards. That got pushed on the back burner to get other things accomplished.

Cut Stone Arches

When I was finally able to devote my attention to this again in March, I picked up where I left off with fitting those modular arches to the curved track sections, this time fitting all three types of sectional track we use and not just the 10′ diameter curves. And this time I added using PVC pipe as part of the mold for casting the arch section. The original PRR plans called out an 8′ diameter vaulted section, but I’m using “artistic license” to use a circular arch to adjust to the outside diameter of a 3″ PVC pipe, namely 3½” or 7′ at 1:24 scale.

Also new this go round is the roadbed section. In fact, I started by thinking about how to cast the roadbed in sections, and upside down, to get the profile I’m looking for… A “standard roadway” as it was called by the PRR. At first it was a 1×6 wide, but it looks like a 1×8 will more closely match the roadbed profile. The thought is to cast standard length sections that fit together in a keyed fashion for a majority of the tangent sections, custom fitting transition segments for making up the curves.

But then the problem becomes how to join these 1½” – 2″ thick sections together with a 6″ tall casting without having to mortar everything together. Or perhaps it does mean a mortar joint. Another problem is how to cast 16′ of arches all at once, or rather, how not to cast it all at once but in more manageable sections, like 4′. Maybe I can float the roadbed profile into the arch casting with a profile tool if the slump isn’t excessive.

Better Than Bricks?

Obviously a few “kinks” left to work out… But that’s another story for another time.

The Battle Continues

After repairing or outright replacing those five stringers, even more need replaced! It’s difficult to keep up now that I’m back to work and have only weekends to effect repairs. This says nothing about new additions or improvements so far. A phrase from the movie “Blade Runner” comes to mind, Accelerated Decrepitude. There is something in the soil that seems to promote and accelerate decay.

The soil is basically sand. Fine sand, with bits of dirt or organic matter that clings to anything that disturbs it. It’s everywhere. It was the motivating factor in building a plywood floor over it in the garage. Every time, and I mean EVERY time I worked on a project in the garage, I had to plan on showering before bed because my legs were filthy, covered in that fine dirt. It’s more like silt it’s so fine. I’m beginning to wonder if they dredged Lake Dora for fill in the historic district!

To battle the constant onslaught of rot and decay, we now treat EVERYTHING made of wood with copper naphthenate, a rot preventative. This treatment is required to be applied to cuts in pressure treated lumber by many local building codes. I learned too late that just because lumber says it’s pressure treated, it does not guarantee it won’t rot, especially if it’s been cut. It’s only a surface treatment, but as far as I can tell, it’s just “tinted” lumber, not “treated”. Long story short, we need to find a different material to construct our stringers.

More Stringers

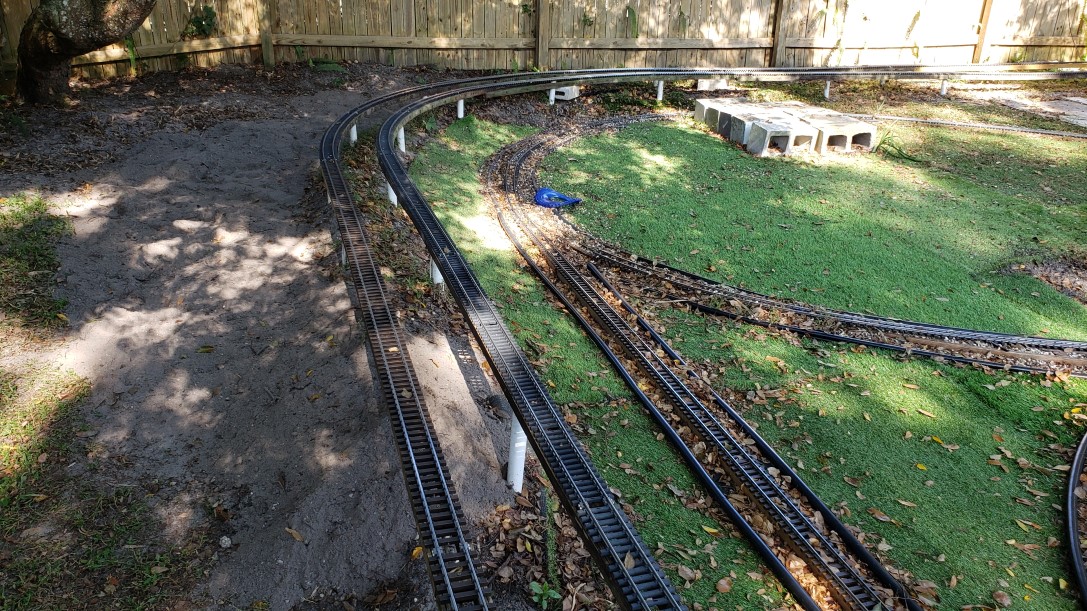
So not only did it take another three stringers to finally replace all the rotted ones, the “triple decker” took yet another set of three stringers. What’s a triple decker? That’s what we call the new upper loop arrangement that passes over the lower loop and under the old upper loop at the bridge, making a third level between the ground and the bridge. Hence the name “triple decker”. The idea is to break up the monotony of trains always travelling the same direction.

A little background is in order. Ann asked if we could run the trains the opposite direction. Sure we can, but why? It’s boring. Another key factor is the pups always having to jump over or crawl under the old upper loop. With this new arrangement, the entire upper loop does not remain nearly two feet off the ground, it slowly descends toward a mid point not quit a foot off the ground. Plenty of opportunities for bridges and meets and future sidings.

We wanted something different… We got it. And we got more work to go along with it! And well worth it too. Those last three stringers make up a new connection between what used to be the downgrade stretch of the old upper loop and the opposite end of the old upper loop, what used to be the upgrade end, now the downgrade end. The old downgrade end of the old upper loop is now the upgrade end. That’s a lot of words. And a lot of handwaving. And a picture is worth a thousand of them…

Triple Decker Under Construction sans Bridge
New Upper Loop “Triple Decker” Arrangement


To put it another way, the traffic on the loop now runs in the opposite direction than it used to. And now that we have a new arrangement, it’s apparent the old terraced planter arrangement no longer fits. We need something new to take its place. A new arrangement perhaps? The idea is to have a long tunnel for the lower loop along the fence planters and the new upgrade portion of the new upper loop emerge from a cut though the reason for the tunnel. A mountain. A foothill. Some reason for the arrangement to exist. Some natural arrangement.

Naturally that means dirt, and a LOT of it. Truckloads of dirt. We’ve talked about this many times, but never acted on it. Moved a lot of dirt from here to there, and back again, like when we removed the pond. But that backfill took away most of what was left of the dirt. A small mound compared to the “mountains” of dirt we’ll need to provide the illusion of terrain. The key point here is illusion of terrain. We’ll come back to that…

“Mega Stringers”

With all that rework on the upper loop pretty much finished, we turned our attention to the long neglected lower loop. You’ll never guess what needed replaced… That’s right, more rotted stringers! So what’s new? Well, this time the elevation changes are part of what we need to address this time around. Part of what I’ve been planning for casting the cut stone arches is how to “turn the corners”, so to speak. The common theme is using a number of short, straight segments that fit the curve. For the casting, the length is 8″. What length 4×4 will work for the 20′ diameter curve of the lower loop?

Turns out the answer is it depends. If it’s just a single 4×4, then the answer is segment about a foot long, not much more than the 8″ for the castings. But, if it’s two 4x4s wide, side by side, then four feet works well. Well enough to cut an 8′ long 4×4 in half for the two pieces needed anyway. We’ve had the 4x4s just laying around since we dismantled the planters along the station siding by the patio. It will be nice to put them to use again.

Using 4x4s also addresses the issue of elevation change using a simple “cut and fill” method. That is to say, we dig out (cut) where the 4×4 will be too tall, then use what we dug out to build up (fill) where the 4×4 is not tall enough. We cut away the turf along the path of the lower loop where the 4x4s sit. To keep the 4x4s in place, we drilled holes from top to bottom, then “pinned” them using short lengths of rebar through those holes and driven into the ground, flush with the top of the 4×4. It works okay, but we’ll need to revisit the grade periodically.

Oh, and guess what else? We needed to replace yet another stringer! Surprise, surprise. That stringer sets the grade for one end of the 4×4 Mega Stringers. On the plus side, that work allowed us to pull the lower loop in closer to the upper loop so the big guy doesn’t keep tripping over it.

Ideas For The Future

Regardless of how the illusion of terrain is accomplished, the purpose is to provide a view block, mainly to disguise the fact the trains are running along two giant loops. The more we look at it, the more we realize how much more dirt it will take to make a believable scene. Following the lines of the new mega stringers, we imagine laying out a staircase of planters to achieve the objective, each a step higher from the last. Maybe a tunnel over the lower loop? No. That will encroach the already limited space between the lower loop and the side of the house.

Struggling with how to cap the long tunnel and still provide “quick” access to derailments and accidents, we try various arrangements of concrete blocks and caps, but worry about the strength of the caps and their ability to support foot traffic without cracking and breaking. The plan is to extend all the way to planters along the fence and use a series of “step ups” to achieve the elevation necessary.

Once again, we’re back to the idea of steps. Steps. Hmmm… Steps to a deck perhaps? What if we built a deck to take the place of all that dirt? A deck solves a number of problems plus it provides a larger space to relax and watch the trains. If we make the deck the height of the middle section of the triple decker, we’ll actually be surrounded by them! All that remains is to make it happen.

That’s another subject for another time. We’ll make another post, most likely posts, to track our progress. Enjoy!


Earth Moving Day

Finally Getting Dirt!

Not to be confused with finally getting dirty. I’ve wanted to get a load or two of fill dirt for the Barkyard for years now. More so lately to help restore the pleasing waterfall scene behind the bridge. How else will we rebuild Mount Crumpet? But seriously, there are now many more places that need fill, beyond having “terrain” for our pike.

I’ve been slowly filling in the ascent from ground level along the back corner of the fence by the golden rain tree, but the grade still isn’t tall enough to meet the bottoms of the track stringers. Unfortunately, even though the stringers aren’t making ground contact, the “splash erosion” effect has covered the stringers with dirt, causing them to rot almost as quickly as if they had been…

I’ve come to the realization that “pressure treated” is just a marketing gimmick and has nothing to do with rot resistance. I could have used regular lumber and had the same results. Only after I constructed the entire railroad using wooden stringers, whose slats are cut from pressure treated 2x4s, did I discover cutting them renders the treatment useless!

That’s another story, but part of why we’re moving earth today. I’m hoping to add more fill so I can cast concrete in place of those rotted stringers. Something needs to be done, and quickly! Not only does Brigel knock the track loose jumping over it every time chases a squirrel along that back fence, but he also finds the latest stretch of failing stringer, snapping it to pieces!

Even though I’ve placed one prop after another under the bad parts, just to keep the railroad in operation, I find more damage every time I look. Irreparable damage that can only be remedied with a replacement stringer. An eight foot long stringer that requires the better part of a 2×4 to construct.

I’ve used copper napthenate treatment to coat all the replacement stringers I’ve built to replace the rotted ones, but the outcome of that experiment won’t be apparent for years. Time to try something new, like casting concrete. The thought is to make a nice looking set of arched spans that carry that stretch of trackage along the back fence, complete with a bridge over Main Street crossing beneath, and disappearing into the distance beyond.

This will eventually meet up with the earthen embankment to carry the rails around the corner and climb closer to the upper loop, which brings us back to moving earth. Even with casting concrete, I still don’t have enough dirt to climb up to where the bridge over the (future) water feature river and associated trestle work will go.

Mind The Gap

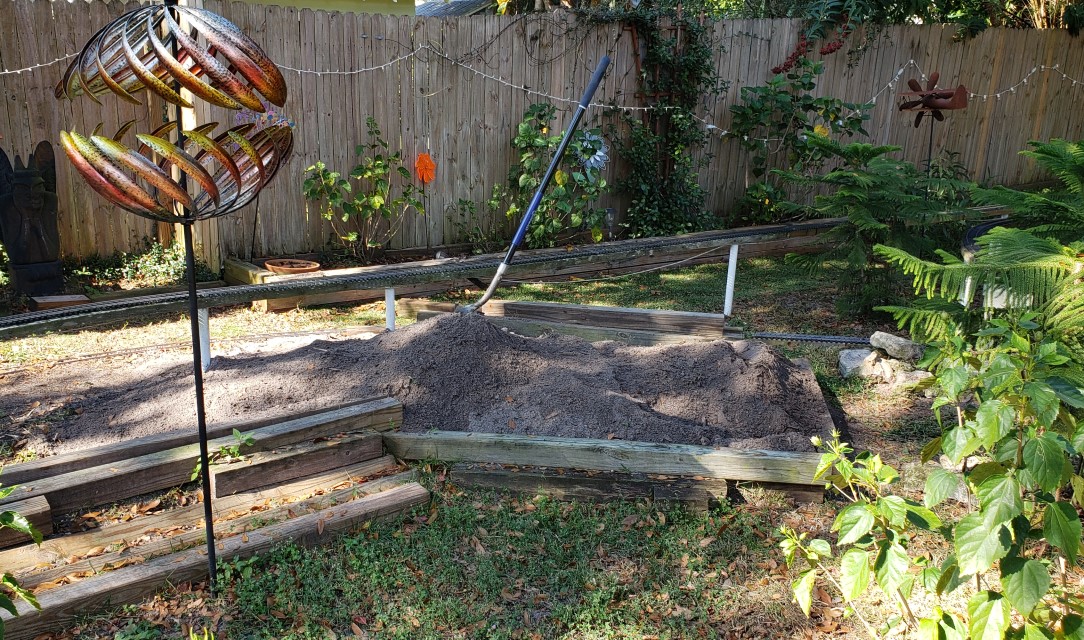
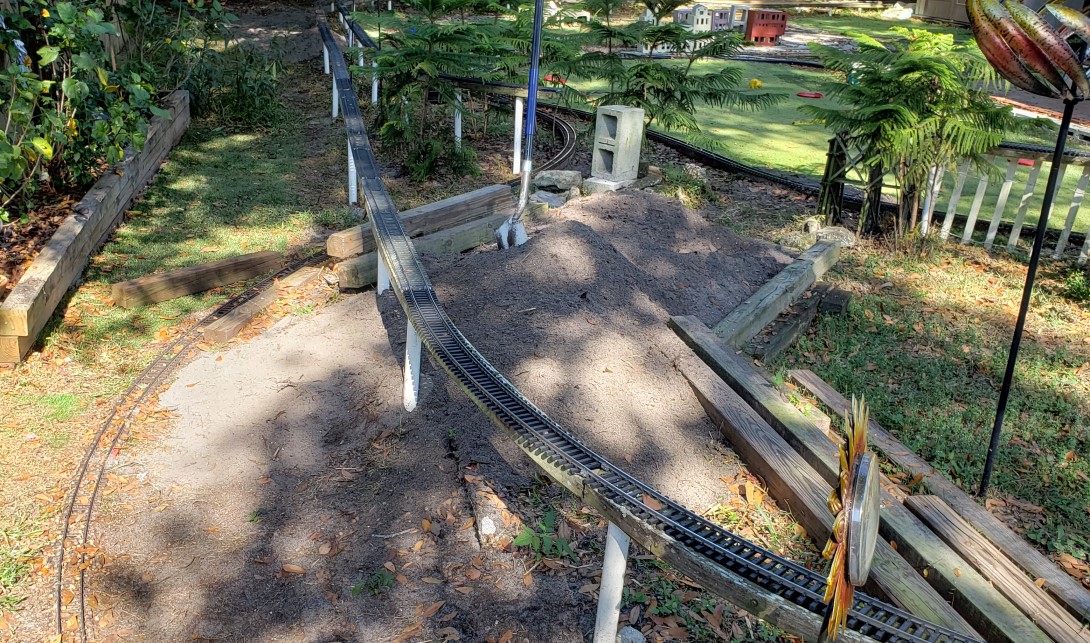
But that’s not the only place we need dirt! The space behind the curves in that back corner, between them and the golden rain train, has been trampled down over and over again by the dogs jumping over that section of track as well. In fact, the first three yards carts were placed directly in the “hollow” there. Kind of ironic that our son Nick’s pup, Klaus, is the reason we have all this dirt to move in the first place.

In the same way our pups displaced all that dirt, Klaus had banked the dirt up against the fence over at Nick’s place. Not all at once, but slowly over time, chasing the ball and planting to stop before plowing through the fence. Nick pulled all that dirt back away from it, going on a month ago now, the dirt having covered over the bottom runner in most places. While it was originally a single pile the length of the fence, it’s already been plodded over by Klaus and transformed into three separate mounds of dirt!

The grade was to high there, and every good rain we’d get would run straight down into the front of Nick’s garage, flooding it. Now there’s a swale of sorts between the fence and the drive leading to the garage, effectively carrying the water around the garage. So that’s the reason we’re moving earth today. Nick wants to be rid of it, and we want it.

We need it. We need it to fill in where the stumps of the trees we had removed were ground have now rotted and the ground sunken and settled. We need it to fill in along the path where Ann had put all those stones and it washed away the sides. Every time it rains here, we watch a little more of the Barkyard wash away beneath the fence and down the driveway.

These are upcoming projects, we’ve just been waiting on it to cool off here. When it’s still in the mid eighties in December, it’s a bit too warm for me to be out there swinging a shovel! The plan is to get the earth moved here, then we’ll figure out where to move it from there.

Moving Earth

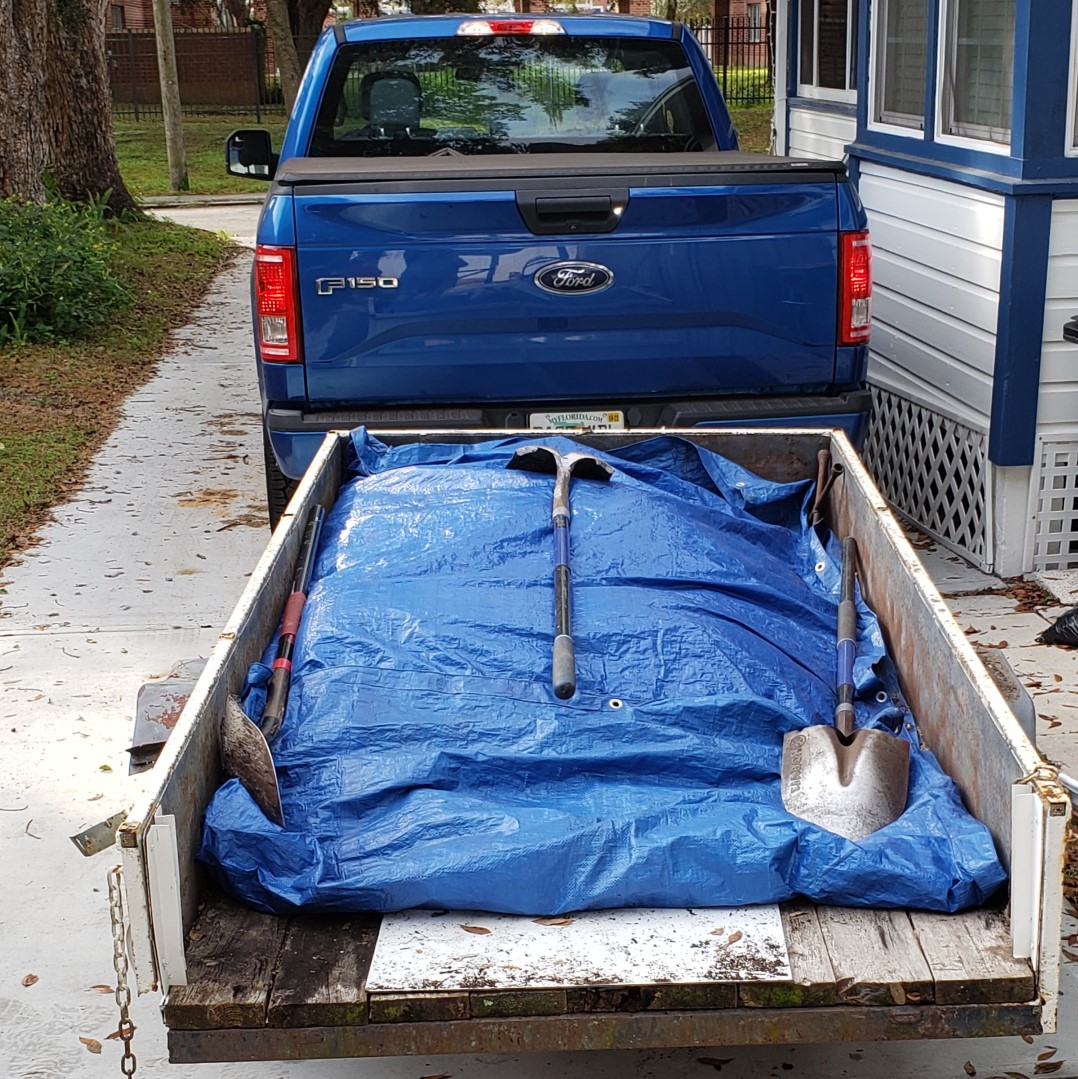
When I still had my truck, we’d load whatever into the bed on top of one of those hand crank belts that’s supposed to easily unload by slowly moving it to the edge to of the tailgate and then fall out. We used it to move quite a bit of gravel to fill in the drive before finally having it paved. The belt worked with small loads, meaning we had to unload half by hand with shovels until the belt would finally slide along the slick Masonite we placed beneath it in the bed.

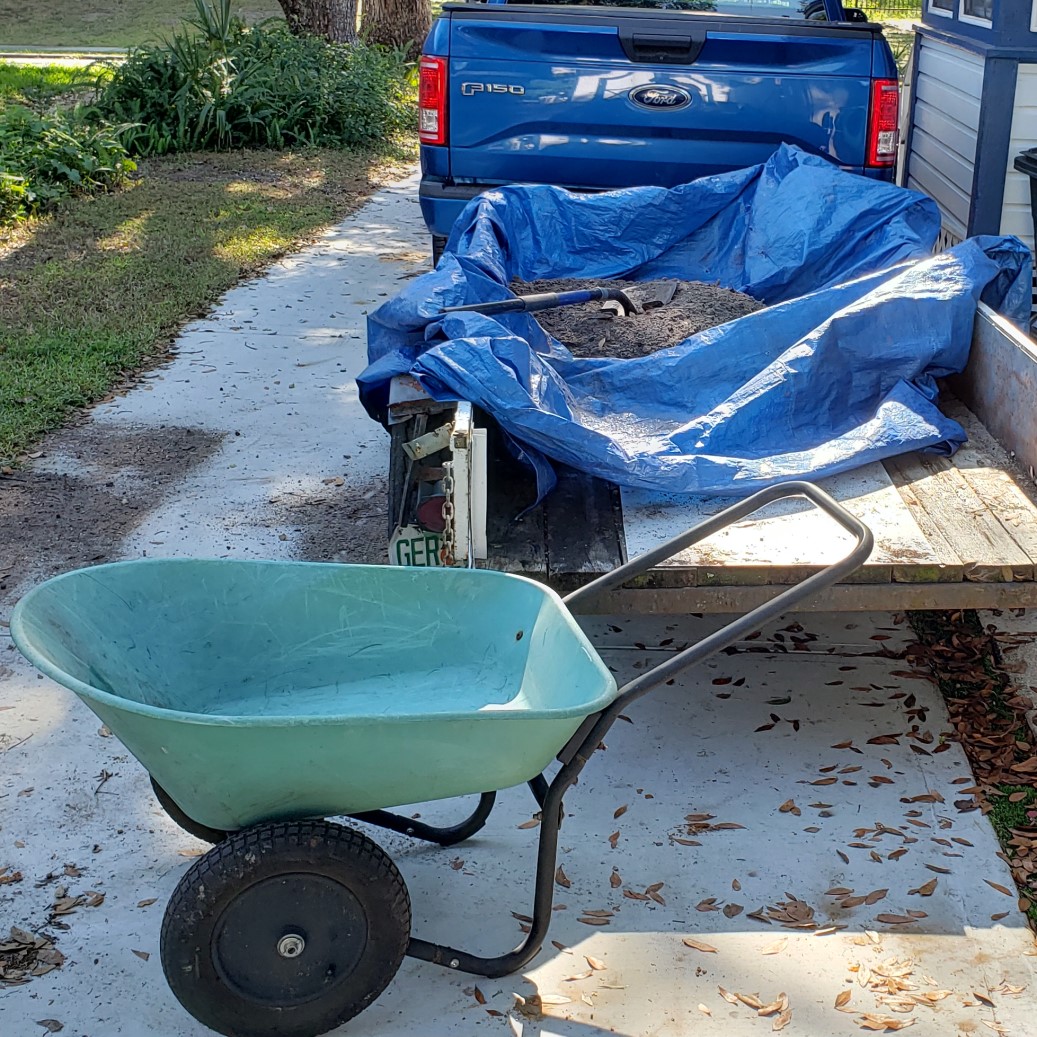
Well, two things wrong with doing that this time. First, I no longer have my truck, which the device was fitted to. Second, Nick’s new truck has a much different tailgate, and it would take too much to rework it to fit. That’s when the idea of borrowing our neighbor’s trailer started floating around in a discussion after dinner one evening. At first, I thought they were joking, trying to get a reaction out of me.

Nope. A couple days later I brought up the subject again, asking if they were serious about the trailer idea, and found out they were! The caveat is whether the trailer is up to the task or not. I agreed to have a look over it the next day, which I did. The bed had a plank replaced and it had already rotted into nothing. The remaining planks were dry rotted on the surface, but I felt still had enough strength to support the load with the help of a chunk of plywood to cover the gap.

So we planned on starting bright and early nine o’clock Saturday morning. I would see about getting the tires filled with air and we’d go from there. Well, best laid plans. I started the compressor right before Nick arrived… Turns out the hose reel will only reach the closest tire, and even then just barely, with a questionable valve stem. Thankfully Nick bought Ann a battery powered inflator for her car, just in case of a flat. It works like a charm!

The next hurdle is the hitch, and of course, the ball on Nick’s hitch is too big. Thankfully we saved the one from my truck that had the different sized balls still attached, but it was over at Nick’s. He had to run home to get it, but it fits! He left it attached to the hitch on the trailer and I wheeled it up to the receiver as Nick pinned it in place.

We already know the lights are shorted because it blew the fuses in my truck last time we tried to use the trailer! This time we know better, so I’ll follow Nick in my car to afford the safety trailer lights would afford other drivers if they worked. If also helps to avoid an accident should something happen in transit.

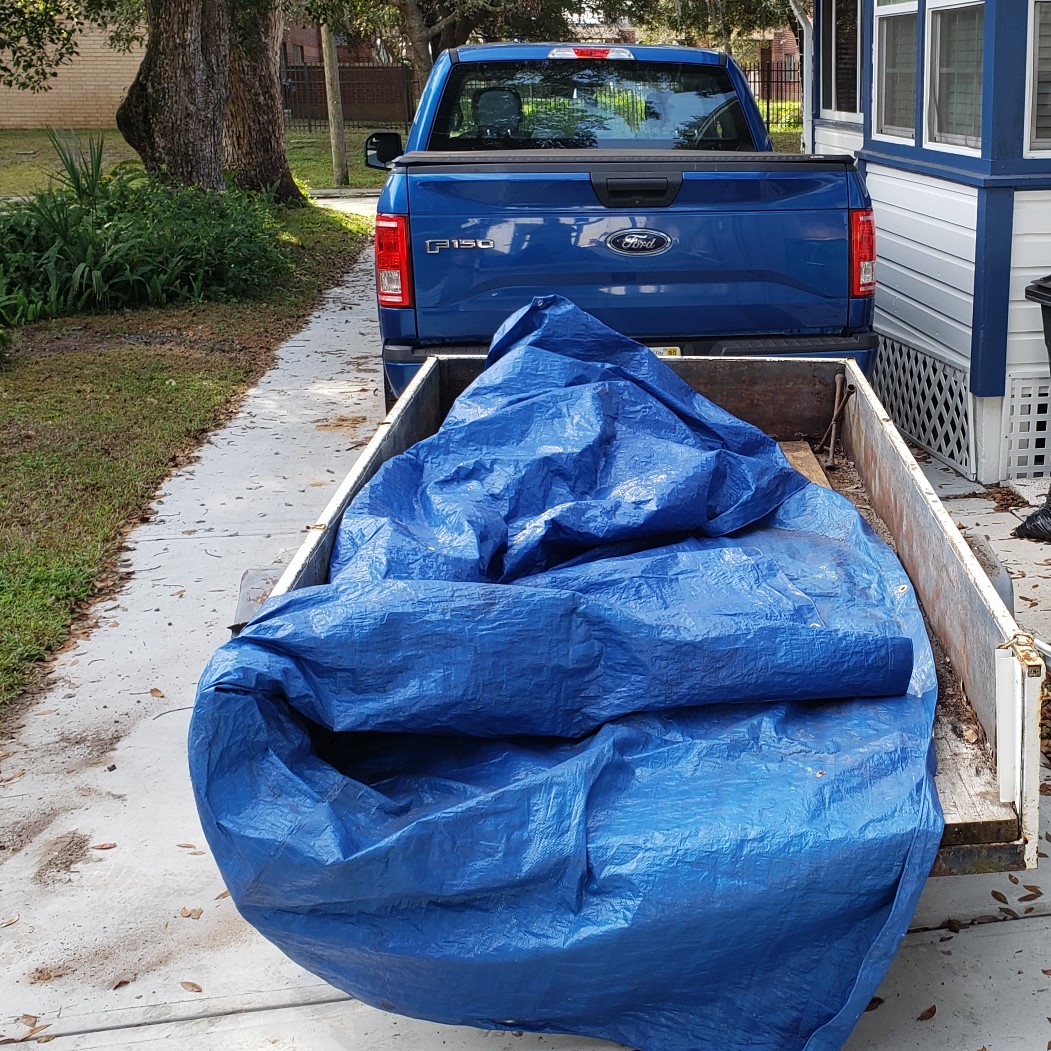
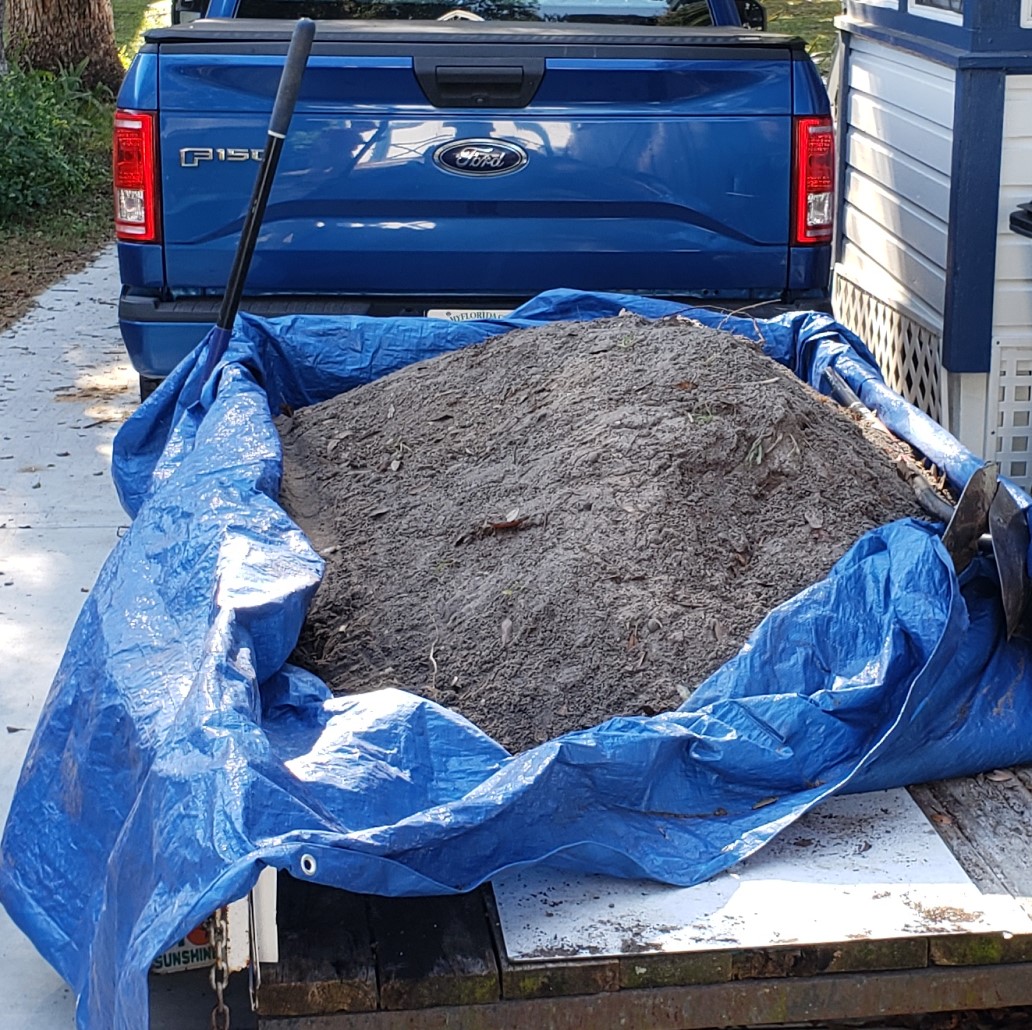
We get to Nick’s and he backs the trailer down the side drive to the first pile of dirt closest to the now open gates. Open now that he moved his car out of the way! We spread a tarp over the bottom to help contain and cover the load. The first pile goes on quickly, but not without a few breaks for me to catch my breath. We pretty much filled the trailer up to the sides and realized we had much more dirt than we first thought!

Two loads was looking more like four loads at the very least, but this one is loaded and ready to go. Nick heads out and as I’m backing out, some idiot comes flying down the street so I don’t have enough time to get in front of him… So Nick just stops, forcing the idiot to have to stop and go around him. I’m chuckling now, and I’m sure Nick has a grin on his face too. That soon fades a we begin to unload though.

Moving Earth A Yard Cart…

That’s right. It took enough to load this trailer, throwing a shovel full at a time in, but now it’s emptied a yard cart full at a time. Even if we could have adapted the unloading belt contraption to the trailer, only part of the load would end up in the yard cart, and only after emptying half of it by hand just so we could turn the crank. At first, it’s the two of us shoveling into the yard cart, then me unloading it where it went.

After the first few loads went straight into the hollow by the golden rain tree, it became more difficult to unload because now even part of the yard cart load had to be shoveled into position inside the upper loop. I nearly destroyed the track and the stringer trying to dump the half full cart over it, even after building a ramp with the dirt to help clear them.

Thankfully the trailer is empty before having to deal with it again. As we’re sitting there and taking a break, the idea of removing the bridge and just wheeling the cart through there is thrown out there. That’s it! It only takes loosening four of the rail clamps and it will lift right out of the way. Anything to make this easier.

There are roughly seven full yard carts worth of dirt in this first load. We’ll see if that holds true of the next load. I had just pulled up to the curb out front of the house, after blocking the street to give Nick enough time to back the trailer into the drive, but now I have to turn around just to follow him again. And once again, someone is zooming down the street to try to keep me from getting out… What is it with these idiots? Looks to be the same car too!

This time Nick is backing all the way into the yard so he can close the gate and let the pups out. They were asking to come out the first time, but the last thing we wanted was to have to chase them if they got out. I was getting the tarp ready for the next load when they came racing over to me. Nick says it’s the quickest he’s seen them race to or through the door. Well of course! It’s grandpa!

I give them the love and attention they seek, with Lena standing straight up on me and nibbling on my beard. It’s only takes a moment and they’re happy. I grab my first shovel full and right as I’m ready to throw it in the trailer Lena jump up in it! She’s lucky I saw it and stopped short or she would have been covered in dirt!

Moving Earth A Shovel Full…

This time we fill the trailer up past the sides, mounding it up to try to keep it to three loads if possible. It gets to the point that I have to stop to catch my breath after what seems like every shovel full. It’s not quite that bad, and the pups are a natural reason to stop, to love with them and throw the ball. After we finish and tire the pups out, it’s back to the Barkyard with the second load.

This time Nick has a hard time getting the trailer back up the driveway. I’m blocking traffic for him again this time, but it’s giving him fits after several maneuvers to pull up and straighten out. I had suggested he could just pull in, right up to the carriage doors, and still have enough room to unload and open the gate. Once the trailer’s empty, it’s nothing at all to unhitch it and move it so he can turn the truck around and hitch back up.

I’m guessing he’s wishing he did after all the fuss he went through. I can tell he’s not very happy. Maybe it’s too much like work for the both of us at this point. The unloading the first yard cart has me winded, but ready to go place it/ After wheeling it over to the dirt ramp I made and trying to unload it there again, I am reminded we were going to lift the bridge out of the way. DUH.

I grab the tool for the cap screws on the rail clamps and get busy removing the bridge while Nick shovels another cart full of dirt. I wheel it over the track and stringer that runs along the front of the bridge, but decide I need another dirt ramp to ease the transition. Nick is off loading another cart while I’m spreading out the dirt and making that ramp.

This time Nick is able to roll it over the stringer an dump it while I pull some of it back and away from it. I’m definitely winded and need to take a break after this though, I tell Nick I might have one more load in me… Thinking we can get the rest in one more load and more more big push.

The next load has me once again dragging a few shovels away from the pile, then resting to catch my breath. A few more and another break. I reiterate I might have another load left in me. By now, Nick is sitting down to take a break while I handle unloading another cart.

We’re both getting slower and slower as it gets to be after noon. I lost count at eight carts, but there’s still more left on the trailer! Nick is out of steam and needs lunch before he can do any more, so he and Ann head out to grab us some lunch. I take the opportunity to set the fan on high and sit under it and cool down. It’s taking them longer than expected this time, but they finally make it back. It tastes even better than I imagined, so I must be hungry!

After Nick unloads the last of the dirt, he calls it quits. No more today. We’re done. While I’m disappointed we won’t be finished today, I’m more than happy to be done for now! He unhitches the trailer and tries to move it back where it where it sat, but I can tell he’s tired after multiple tries and he’s still not close. I take over for him and he heads out while I try spreading out the dirt inside the upper loop in the manner I first envisioned.

The Vision

We want to restore the pleasant view of the waterfall, but it’s going to take time to get a “self maintaining” water feature installed. Until then, we need a reason to have a waterfall. One that looks like a natural, abrupt change in elevation. The original idea was to build height in a terraced fashion, one 4×4 at a time. The first step roughly 3½” deep. The next 7″. Then 10½”, 14″, etc., eventually reaching the 20″ height of the trestles supporting each end of the bridge.

But I don’t think Ann quite understood where I was going with that and promptly planted a bunch of Azaleas along where the first step of the terrace was supposed to start. They’ve been there long enough that the dogs have killed off a couple over the years, but those remaining still grow and bloom like crazy. They’re part of the landscape now and removing them would remove the view block they provide for what’s behind them… DIRT!

So the modified version is still terraced, but lowering the target height by rearranging the track layout. The current upper loop arrangement has two tracks at about the same 20″ height off the ground. If we modify the arrangement such that one end passes over the other, then one end only has to clear the new lower loop by 8″. That gives us nearly an entire loop of 20′ diameter track to gain another 8″ clearance we’ll need to cross over the other end.

Essentially only one of the two tracks that ascend to the upper loop need to ascend as high off the ground as they do now. The other can level off and run beneath the other, but over the new lower loop beneath. It will be an eye catching arrangement, with the a bridge over a bridge over another bridge over the “river” below. I have some design work ahead me before that happens. The “Mount Crumpet” picture below shows the bridge removed and the two ascending tracks to the upper loop.

And I have some really bad trackwork that needs repaired before any of that. Add a new Main Street and more downtown buildings and it starts to push things out quite a ways into the future. I think we’ll start with getting that optimistic last load of dirt over here. That isn’t happening next weekend, and the following weekend is Christmas. I was hoping to get some semblance of a Christmas train working this year and Christmas decorations for downtown, but it’s looking more and more like I’ll be lucky to have any Barkyard decorations at all, 1:1 scale or otherwise!

We’ll keep this updated as we make progress. Stay tuned!


Happy Thanksgiving!

Happy Thanksgiving From Our Crew To Yours!

This is just a quick note to wish everyone a Happy Thanksgiving before the parade starts. It’s our Holiday tradition to sit together and watch the parade and enjoy some sweet rolls. After getting the feast started cooking that is!

We are thankful for our family, our wonderful pups, and our happy homes in the town that we love. We sincerely hope that you and yours enjoy your Holiday season.

We’ll add a few more “goodies” here as they “appear”… And no, not more food pictures!

Our Halloween Ghost Town


The Idea…

We transformed our downtown marketplace into a ghost town for Halloween. The idea that the empty building faces already made it look like a ghost town played right into it…

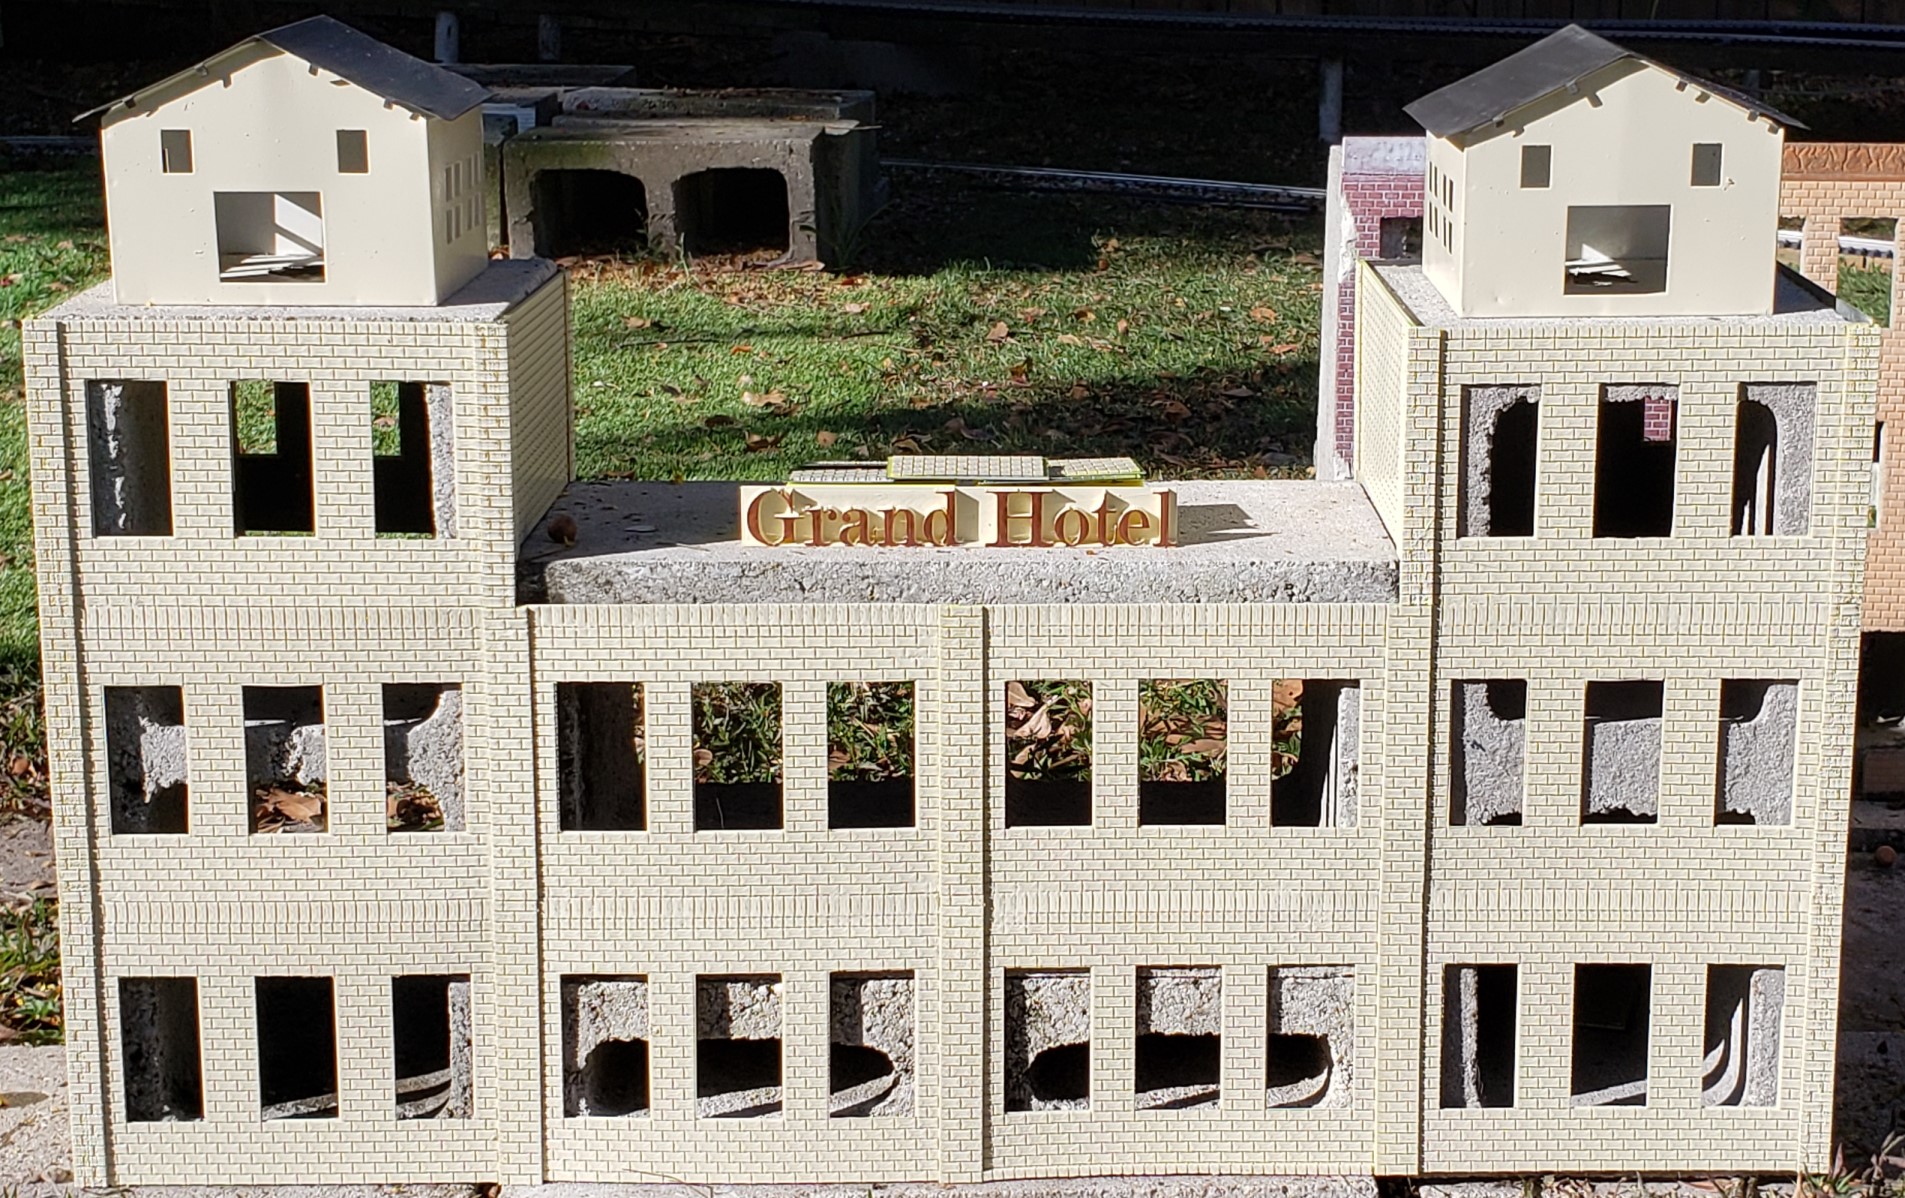
But we needed more than those same tired buildings I cast so many years ago. Something more than three storefront apartment buildings. Something big. Something Grand. Hello Grand Hotel!

But that still wasn’t enough. Those foundation blocks with their corner cutouts have been patiently waiting for some attention too. Hello Corner Drugstore!

All of these additions came together in the few weeks before Halloween. Most of the groundwork began in September, but filing our taxes stole time away from our goals. And we had many goals.

Glow in the dark ghosts. Lightning bolts striking the Grand Hotel sign which would then remain eerily lit. “Uncanny eyes” gazing about in the hotel’s elevator houses atop the towers on either end. Even a drive in theater playing horror movies!

The Result…

Alas, those were not to be, but there’s always next year. We are more than pleased with what we accomplished though! The customized lighting effects stole the show. They were the show!

Eerie “ectoplasmic” colors fading in and out. Bright blues coupled with flashes of lightning give the impression of dramatic and destructive electrical explosions. Surging waves of blood red, as if the building is breathing.

Here’s a look before we even had the Corner Drugstore finished!

The History…

It all started with the desire for better lighting inside our passenger car “fleet”.

All but a handful of these passenger cars are Bachmann, the style with two light bulbs inside and a 9V battery box beneath to power them. They really couldn’t be seen until dark and the battery usually only lasts a few hours until it’s dead anyway. Not real impressive…

I used 5050 LED strips for everything, starting with lighting under our patio train station platform… All 16 feet of it! These were pre canned light strips, complete with remote control and power supply. I even dug in an underground feed right to the corner of the platform dedicated to powering it.

The next step was to fit shorter segments of those strips inside a passenger car. This had a number of drawbacks. First, while small, the Arduino controller still didn’t fit inside the existing battery box. The Lithium battery is slightly larger than that. I designed and 3D printed one large enough to replace the existing battery box.

Fast forward to now. Many iterations of the design later, I switched to using 2812 individually addressable LED strips, for a number of reasons. What’s the difference? The power supply for one. The 2812 strips run on 5V, the 5050 strips require 12V. Not a showstopper, but it does require extra parts to boost the 5V supply I already have to 12V.

The biggest difference between the two types is the ability to address each LED on the strip individually with the 2812 style. While the 5050 version allowed me to mimic the effects of the pre canned units, I wanted to be able to have them individually flicker, even scroll in marquee fashion!

The Effects…

I started with the easy effects, jump, fade, flash, blink. I added the ability to individually address each “pixel”. Then I added the flicker. It can be adjusted to be as slow and subtle as a kerosene lamp to as fast as an arc welder, with a flickering candle flame somewhere in between.

The problem is all the effects are global in nature. That is to say, they affect ALL the LEDs at once. Only the “per pixel” selection allows for changing each pixel’s color independently from one another and the ability to scroll them (marquee).

I spent a good bit of time to marry the two versions together… The issue I have to solve is the all or one addressing, or rather, pixel addressing and grouping. In a nutshell, we have baggage cars (no lighting whatsoever), combination cars (baggage and passenger sections), full passenger cars, and what I’ll call a parlor car (with an additional lit herald on the back railing).

How to handle all these different situations in ONE implementation? The hardware was identical, with 24 LEDs for each. The only exception is an extra 3 LEDs for the herald. The software is as generic as well. Each car has its own configuration that describes its unique situation.

If I haven’t mentioned it before, all these “gadgets” use a web browser interface for control. The embedded Arduino controller has built in WiFi. It operates as an access point that will allow other devices to connect to it as well as connecting to an existing WiFi access point as a client.

All of this allows the Arduino to act as a web server, serving up the control interface web page, available to any device on the network! Smart phone, tablet, laptop, you name it. If it has a web browser, you can control it!

I’ll add a video capture of the interface in action soon…

The old version only accounted for baggage and passenger sections of the combination car. The herald lighting wasn’t even addressed. It’s a step by step approach. First the LED and group addressing. The next is modifying the effects selection for each group and pixel.

In the process, I had to “wedge” the new additions into the existing status reporting mechanism. I pretty much gutted the entire per pixel reporting mechanism and refactored it to better fit into the group addressing scheme. Needless to say, the per pixel addressing functionality was the last to come back online.

Without getting into too much detail, there are two sides of the coin we’re talking about here. The client side and the server side. The client side is the browser client, consisting of HTML web pages, CSS for styling, and javascript for the nuts and bolts programming “smarts” behind the button pushes and handling the web socket interface to the web server.

The web server is the Arduino side, serving up the control interface pages and taking the appropriate actions when commanded. If this is all Greek to you, that’s alright. It’s a lot of programming jargon if you’re not interested.

If you are interested and would like to know more, leave a comment and I’ll be happy to answer any questions you may have. If there’s enough interest, I can add more detailed posts that describe how this all works.

The Ghost Town…

I had to further adapt the passenger lighting controller to become the ghost town controllers, starting with the Grand Hotel. But that’s not the only thing we needed. It would help if we actually had a Grand Hotel! For that, I cobbled together a number of 3D print designs I’d been working on to improve the casting process in the form of custom molds.

After many iterations, I finally managed to match the brick pattern sheets I used to cast the original storefront apartment buildings. In fact, I came up the the positive version before converting it to the negative impression suitable for use as a casting mold.

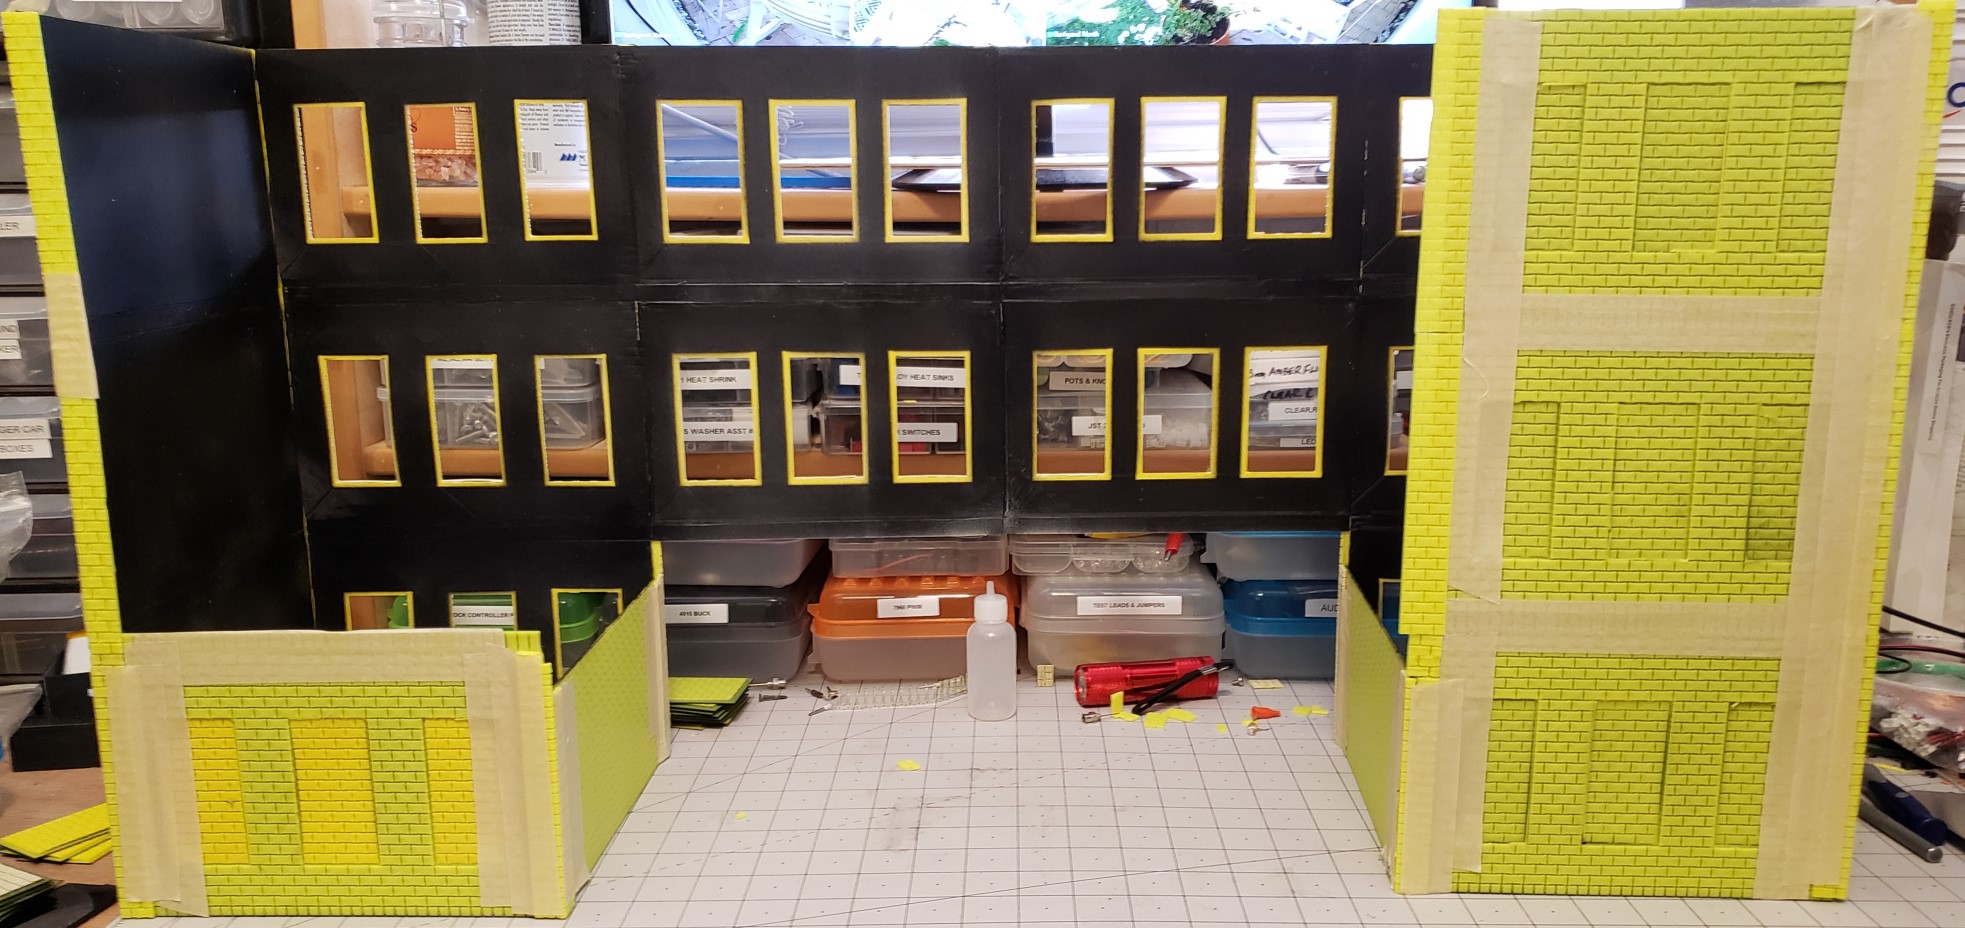
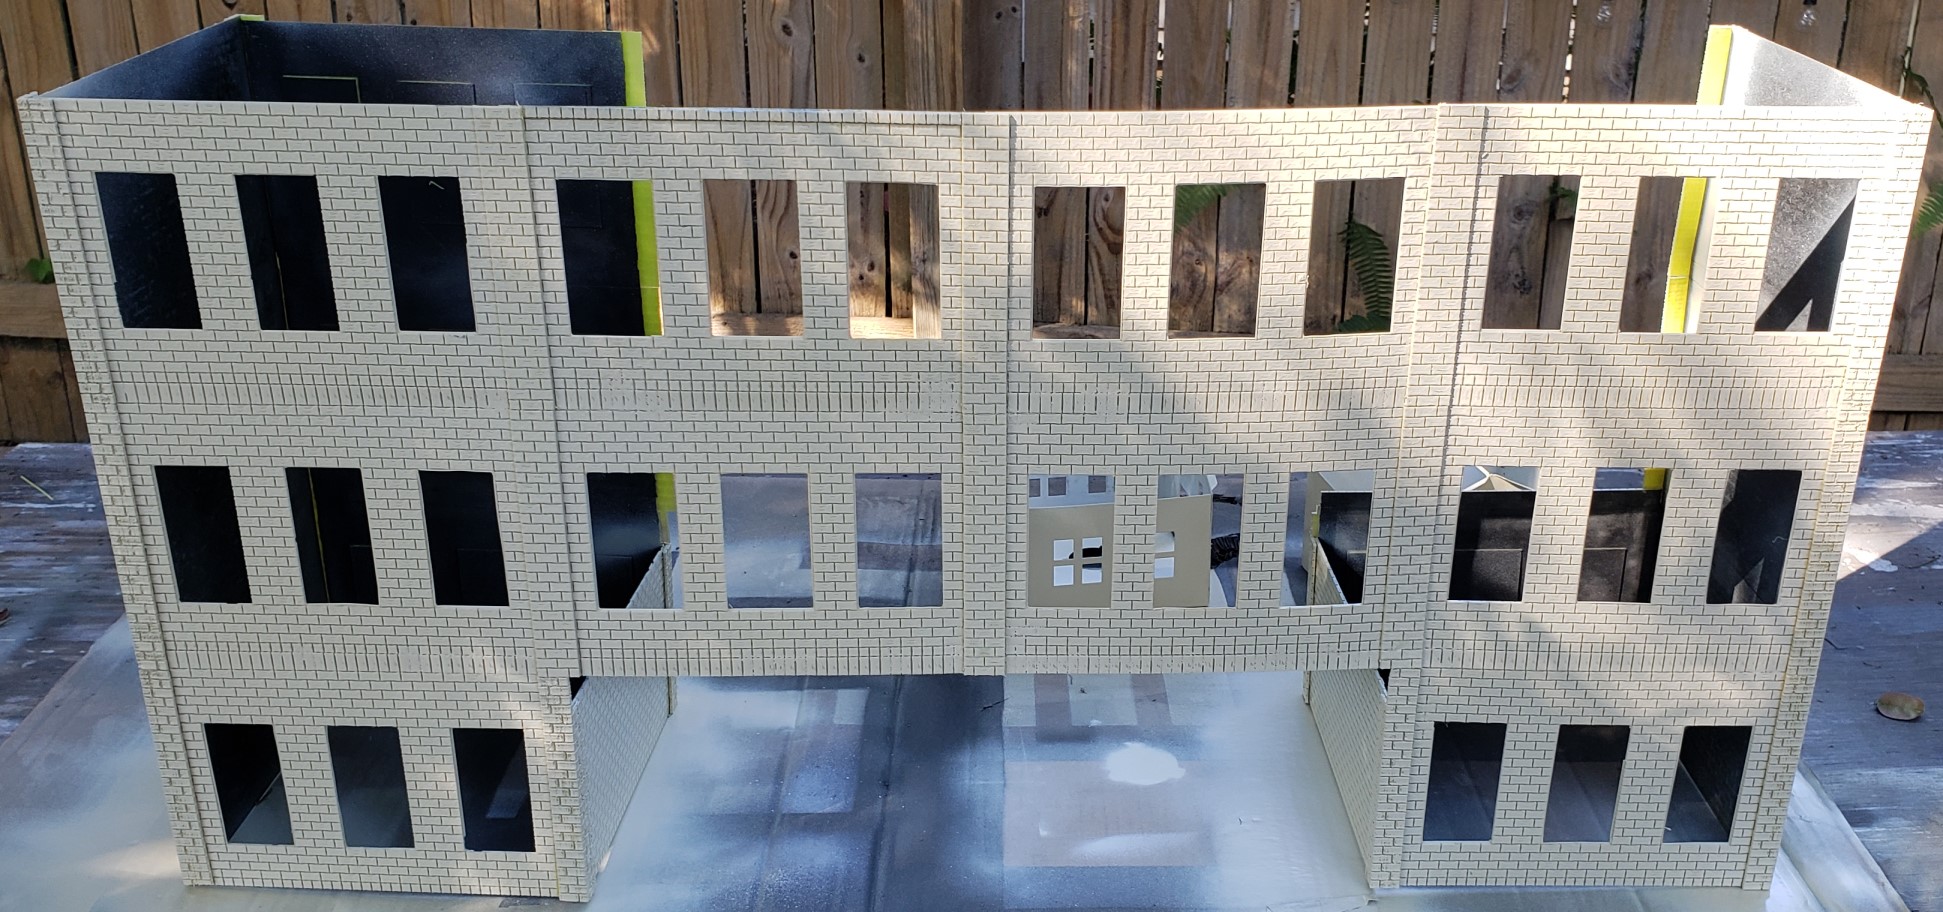
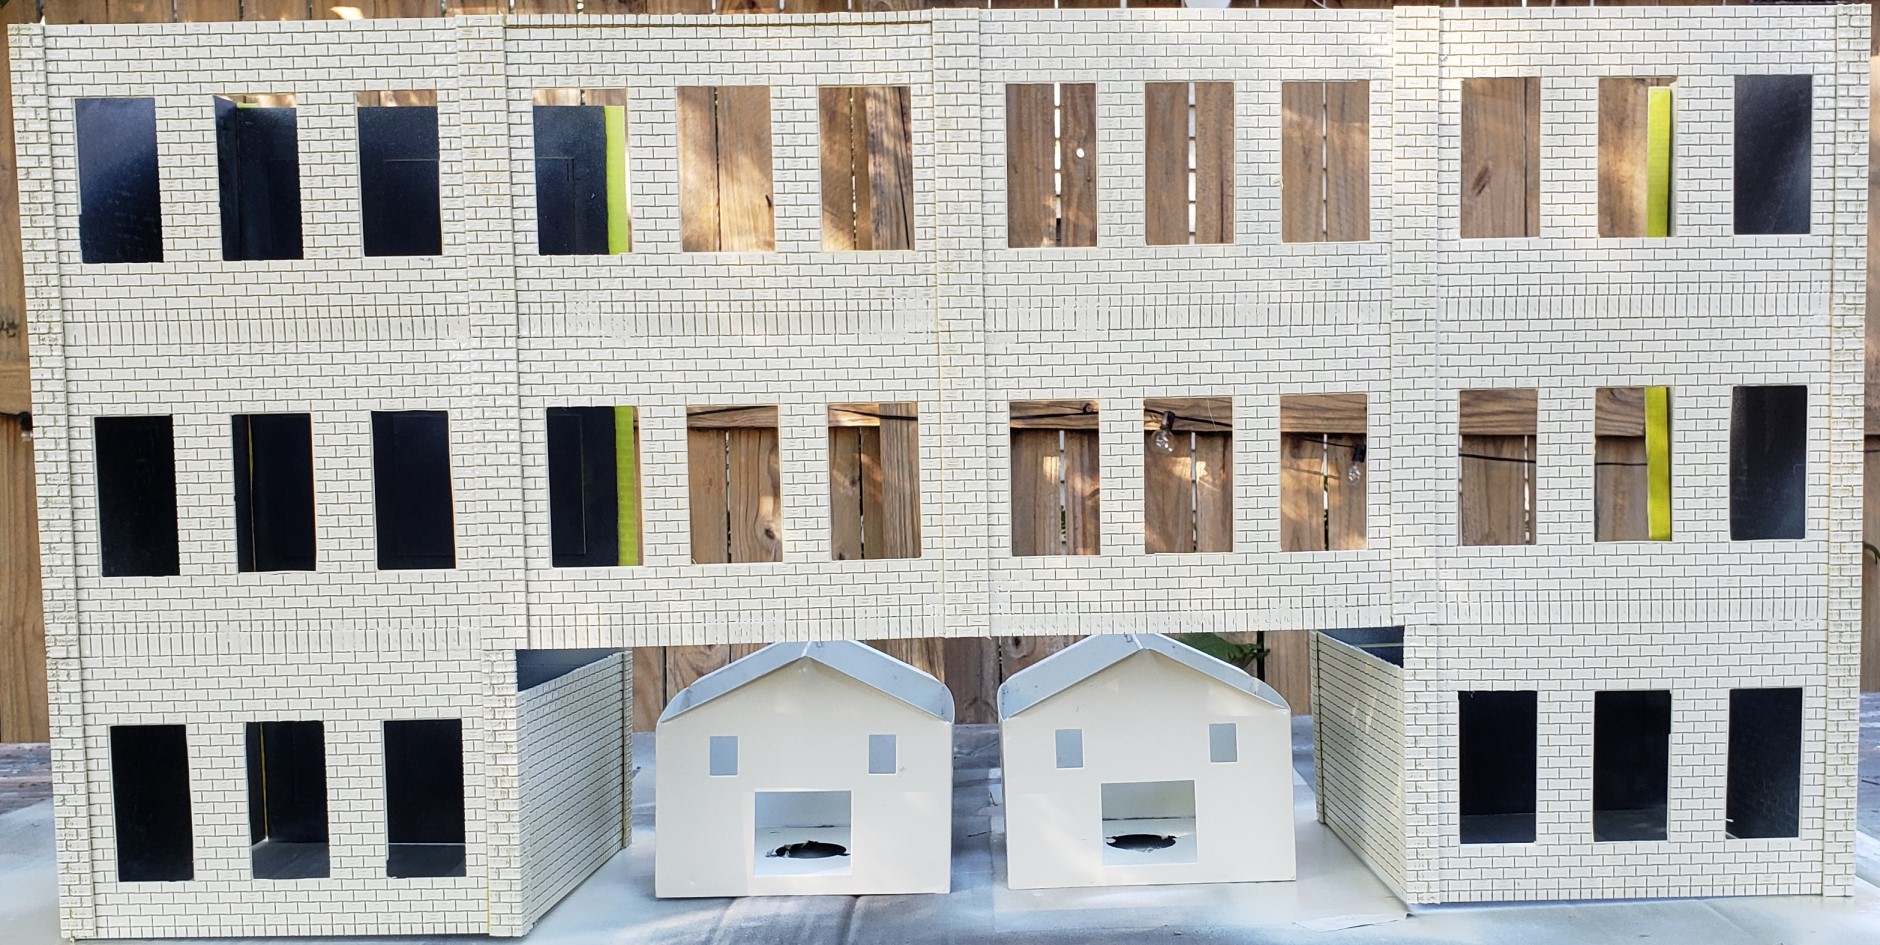
With a few changes here and there, I can print the various pieces of a building, one floor at a time. In essence, I’m converting a concrete block into a building using a 3D printed skin, one 5″ x 8″ section at a time. The sections are then joined together similar to styrene models, using a different liquid cement (chloroform), together with brick strips that mimic columns and headers.

If you’re a model railroader in smaller scales, you’ll recognize the approach is similar to Design Preservation Models modular kits. They supply a set of walls, window, door, and other detail castings, and the assembly instructions. All you need is glue and paint.

The resulting “skin” then slides over the block, after painting of course! It’s obvious the window frames and glazing are missing, but that’s what prompted us to make it a ghost town in the first place! The original buildings had both window frames and glazing in addition to a ground floor store front at first, slowly demolished by continued collisions with the pups.

I start by assembling floor sections together into a single three story wall then comparing it to the block. My first attempt fell short… Literally. Had I butted the brick header strips together with the sections to be joined instead of overlapped on top of them, it would have been just about the correct height.

The Grand Hotel…

Armed with this information, I began to madly 3D print wall after wall. I already had a few walls that I had previously printed, attempting to recreate the existing storefront apartments. My first attempt left too large an opening for the windows. The next attempt matched the window openings very closely, but added an extra brick to the width.

Great for ¼” thick castings… For a 0.072″ plastic brick sheet, not so much. The great thing about thin plastic sheet is how easy it is to cut with a good pair of scissors! Not Kindergarten scissors and construction paper easy, but easy enough to trim half a brick off either end without much bruising…

This is a seat of the pants operation here. It doesn’t need to look perfect and it doesn’t need to last, it only has to resemble a big hotel from a distance at dusk. If you look closely, you’ll see there are no doors anywhere on the ground floor. Kind of like Hotel California, “You can check out any time you want, but you can never leave”, assuming you could get inside in the first place!

In any case, I soon exhaust the entire replacement spool of yellow filament. I screwed up getting the hub to fit inside when I first got it and it’s been hanging there ever since. The fear was a tangle in the line will cause a knot and jam the printer extruder. The result? A failed print at the very least. A flying spaghetti monster if not caught in time.

I was lucky this time though. I was present for most if not all the printing. Each section takes about three to four hours to print, so I continue to update my Arduino code while printing continues in the background behind me. Not only did I exhaust that entire replacement spool, I went through another regular spool as well, plus part of a second!

I had to wait on the second regular spool to get here too! The hotel is complete except for a few sections, so at least the side that shows looks like the Grand Hotel.

The Corner Drugstore…

The Corner Drugstore was meant to be printed from a spool of brick red colored filament I ordered especially for it. There’s something to be said for sticking with the known quality of a brand of filament. Apparently, I chose poorly… I tried three times to get a print just to stick to the bed before I finally gave up and threw it off to the side.

I loaded up my usual brand of filament in the bright red variety and had nothing but perfect prints one after another. This building is different than the others in that the corner entrance wall and doors will be at a 45° angle to the side walls. With barely enough time left to print the side walls themselves, I didn’t take the time to design the entrance and the 45° column pieces.

I did design a different set of window walls though. Two large windows per section for the bottom floor, as if there is restaurant seating, and four small windows for the middle floor sections suggesting a mezzanine. The upper floor sections are the standard three window apartment style windows.

I even added a set of alley side carriage doors with a small office door beside them. It went together quickly, but not quickly enough. I was still adding those finishing touches Halloween night! I ran out of time to cut the aluminum extrusions to size for the LED strip to fit inside.

Not even the original storefront apartment buildings had them, just the Grand Hotel, and even then those were cobbled together and barely fit inside the blocks. I needed something to diffuse the bright spot source of the LEDs. Even with the diffuser covers snapped in the extrusions over the LED strips, they can still be seen and it’s obvious they’re LEDs.

The only “pictures” I have are actual video recordings of it, and even then it’s just the incomplete skin. At least it’s painted brick red and has the lighting effects installed! It was a rush job to say the least. I was lucky to get as much done as I did. Here’s what the end product looked like. Hope you enjoy it as much as we did!

Most of the work remaining on it and the rest of downtown will wait until the new Main Street design is finished. The idea is to pour a thin concrete “sidewalk” that will serve as Main Street and the side streets, including curbs, sidewalks, and a firm, level foundation for all the buildings. But that’s another project for another time…

The Code…

The code has evolved over time, based on the success of previous additions from various projects. It all started with the WiFiTrainController Arduino sketch Nick put together a few years back to control his Lionel trains. Between his inspiration and my renewed immersion into embedded systems control at work, there’s a strong motivation to return to my “gadgetronics” days of the past.

After a number of iterations of modifications, and many failed attempts at getting reliable readings from Hall effect current sensors, I finally stumbled across the resolution to the problem. Unfortunately it meant going in an entirely different direction. That resulted in more iterations and improvements, and some refactoring along the way.

All that work on the block and motor controllers paid solid dividends going forward. The expanded web socket interface was far beyond the original single character command approach. Adding new commands is as easy as adding the command keyword to a map of handlers and pairing it with a new command handler to take the appropriate action on the server side.

This scaled nicely when I began working on the passenger car lighting projects, the direct ancestors of these building lighting effects projects for Halloween. First it was my “Glow In The Day” clocks, 3D printed in glow in the dark filament, then illuminated with UV LEDs to glow in the daytime. Now it’s the downtown ghost town.

Actually, it’s three separate projects, one for the Grand Hotel, one for the original Storefront Apartments, and one for the Corner Drugstore. The code for all three is basically the same except for the number of LEDs controlled and the user interface pages themselves.

In more detail, the projects consist of an Arduino sketch (written in C) and the data files. The NodeMCU 12E controllers are ESP8266 based and contain 4MBytes of flash memory. This can be divided between the two parts, in 1MByte increments.

The program sketch is compiled into an executable binary that is uploaded to the first part of flash memory. The data files are stored using the SPI Flash File System (SPIFFS). It’s a flat file system, but provides hierarchical storage via the file name itself. This is where the web pages, CSS, and javascript files are stored that are served to the web browser.

Here’s a video example of how we select and control the lighting effects we used for the ghost town. As you can see, there’s even enough room in the flash memory for a couple of smaller image files.

The Finish…

I used a dedicated power bank (20,000mAh) each for the Grand Hotel, Storefront Apartments, and Corner Drugstore. Each had its own dedicated Arduino controller as well. I was able to connect to each controller with my phone and the office PC to control them! The only thing I wasn’t able to pull off was the passenger car effects.

I thought I could spend a couple hours and get something whipped in to shape and working, but it was not to be. In fact, it took more than another week to get things the way I wanted them to work. But that’s software. If you wait until it’s perfect you’ll never have anything to ship!

As an experiment, I left the effects running all night long. They were still going in the morning! The power banks were fully charged Halloween night, with somewhere between 25% and 50% of the 20,00omAh charge remaining. I was also quite aggressive with the LED levels for a more dramatic effect. More conservative selections would last even longer.

By comparison, the passenger cars have only a tenth of that power (2,000mAh), and with more subdued lighting levels they are still running in the morning as well. I can get anywhere from 8 to 12 hours from them on a single four hour charge.

Stayed tuned for more updates on the passenger cars and the Barkyard too!


Welcome Lena!


Our New Grandpup!

Welcome Lena Lu, the latest addition to our team. We are so happy to have her join our family. She’s only been with us two weeks as I write this, but to me it feels like she’s always been here. Our son, Nick, may disagree. But he has to put up with her and Klaus all the time. Grandpa gets to go spoil them and leave.

Where Klaus and Rocket missed, she and Klaus hit it off right from the start! Klaus had no choice with her nipping at his hocks to pester him into playing! It’s a joy to watch the two of them together, like it’s always been that way.

She’s part German Shepherd, part Malamute, and not even a year old yet! We’re as lucky to have her as we are happy.

How We Found Her

We didn’t find her, our dog sitter did. She came to us as an abandoned stray, found wandering along the road, rescued by our dog sitter. The sitter related her contact with the owner, who said just keep her. In fact, the previous owner offered to pay the sitter to make that happen! Sounds more like she escaped, but we’ll never know for sure.

The sitter knew Nick was looking for a companion for Klaus ever since we got Rocket and it didn’t work out. So when her husband had misgivings about keeping her, she asked Nick if he could foster her until a new home was found. He welcomed her into his home, and the rest is history.

She’s gentle, loving, and extraordinarily intelligent. It’s hard to believe she was unwanted and abandoned. Makes me wonder about folks sometimes.

Forgetting The Past

Her name was Luna, but she doesn’t answer to her name, and we don’t know what to think about that. It’s her past, but she probably didn’t get much attention, if any. The matted hair behind her ears and elsewhere was a good indication of her past situation. After a trip to the groomer, she’s now a pampered pup!

Nick renamed her Lena. We tacked on the Lu, not as a reminder of her past, but what better to go with Klausie Boo than Lena Lu? She just soaks up the affection and gives it right back. It’s a shame she wasn’t wanted before, but she’s home now!


Happy Anniversary!

It’s Our 38th Wedding Anniversary!

Getting Ready For Fall

Ann and I were chatting about the Barkyard this morning and all the things we want to do. All the things we still have left to do. Things like launching the website so that it’s more than just a landing page. Things like producing videos with trains, not just the pups. After all, it is the Barkyard Railroad!

Our “online presence” is still under construction, to borrow a now antiquated description from the web design museum vault. These blog posts should help fill out content, but the idea is to welcome folks to our Barkyard and to share our enjoyment. Share our experiences. Share the latest developments.

It’s almost September already, what most folks would consider the beginning of Fall. Ann is ready to start the transformation from Summer to Fall. Fall colors. Fall flowers. Fall decorations. You know, bales of hay, scarecrows, pumpkins. Those sorts of things.

Ann mentioned how the “Downtown Marketplace” is looking more like a ghost town these days, and she’s right. We had storefronts and windows and streets, but the constant pounding from the pups have reduced our buildings to empty shells. The streets trampled to rubble.

While it’s a bit disappointing, it just another “puppy proofing” opportunity. We hope to have the time to transform downtown into a true “ghost” town for Halloween, with more castings, lights, perhaps even sound. It’s an aggressive schedule and will take time to accomplish to be sure.

Our Plans

Here’s of photo of what we have to start with for the ghost town. Those three buildings on the left used to reside in the gap to the right. Ann moved them out by the switches to act as a block to keep the dogs from destroying the now unobtanium turnouts.

Ghost Town
Ghost Town

Where they stand now was supposed to be the site of the Grand Hotel, but we never really figured out how to make the castings work for anything more than a single concrete block. Well, not so much figuring it out as much as moving beyond the limitation of a single casting no larger than a concrete block, constrained by the size of the largest pattern sheets.

I’ve been designing some new 3D printed molds that can be joined together into a single, larger “all in one” mold. Our largest pattern sheets (15″ x 15″) are more than four times the size of the available print area (8.5″ x 8.5″). That work is on hold at the moment while we continue on the website. It won’t be long now though. To give an idea of how long it’s going to be, the photo is already more than a month old.

Maintenance is another big ticket item. We had just finished replacing more rotted wooden stringers. You can see a couple of new slats sitting on the sawhorses in the background. We found out the hard way that even though those stringers are not sitting in direct contact with the ground, the dirt splashed up by raindrops is just as hard on them. But we’ll cover that in another post.

Once we get past Halloween, we plan to “refurbish” Main Street. We used “Hardi-Backer” board as the “pavement”, cut to size, and surrounded by concrete block “caps” to simulate a raised curb and sidewalk. While the “Hardi-Backer” holds up to the elements and resists rot extremely well, it’s no match for the constant pounding.

The plan is to cast the streets in concrete, and the sidewalks and building pads for that matter. Perhaps even casting a brick veneer to simulate old time pavers. Brick streets were far more common than concrete roads a century ago. Some brick roads remain in the NE Ohio town where we grew up. Even here in Apopka FL!

What’s Next?

Our intent is to increase the amount of video footage we share. At this point, anything would be an improvement to the handful of short clips of the pups on Facebook. We don’t even have a trailer for our YouTube channel yet!

Feel free to leave us a comment.

Adding Details To Downtown Building Castings


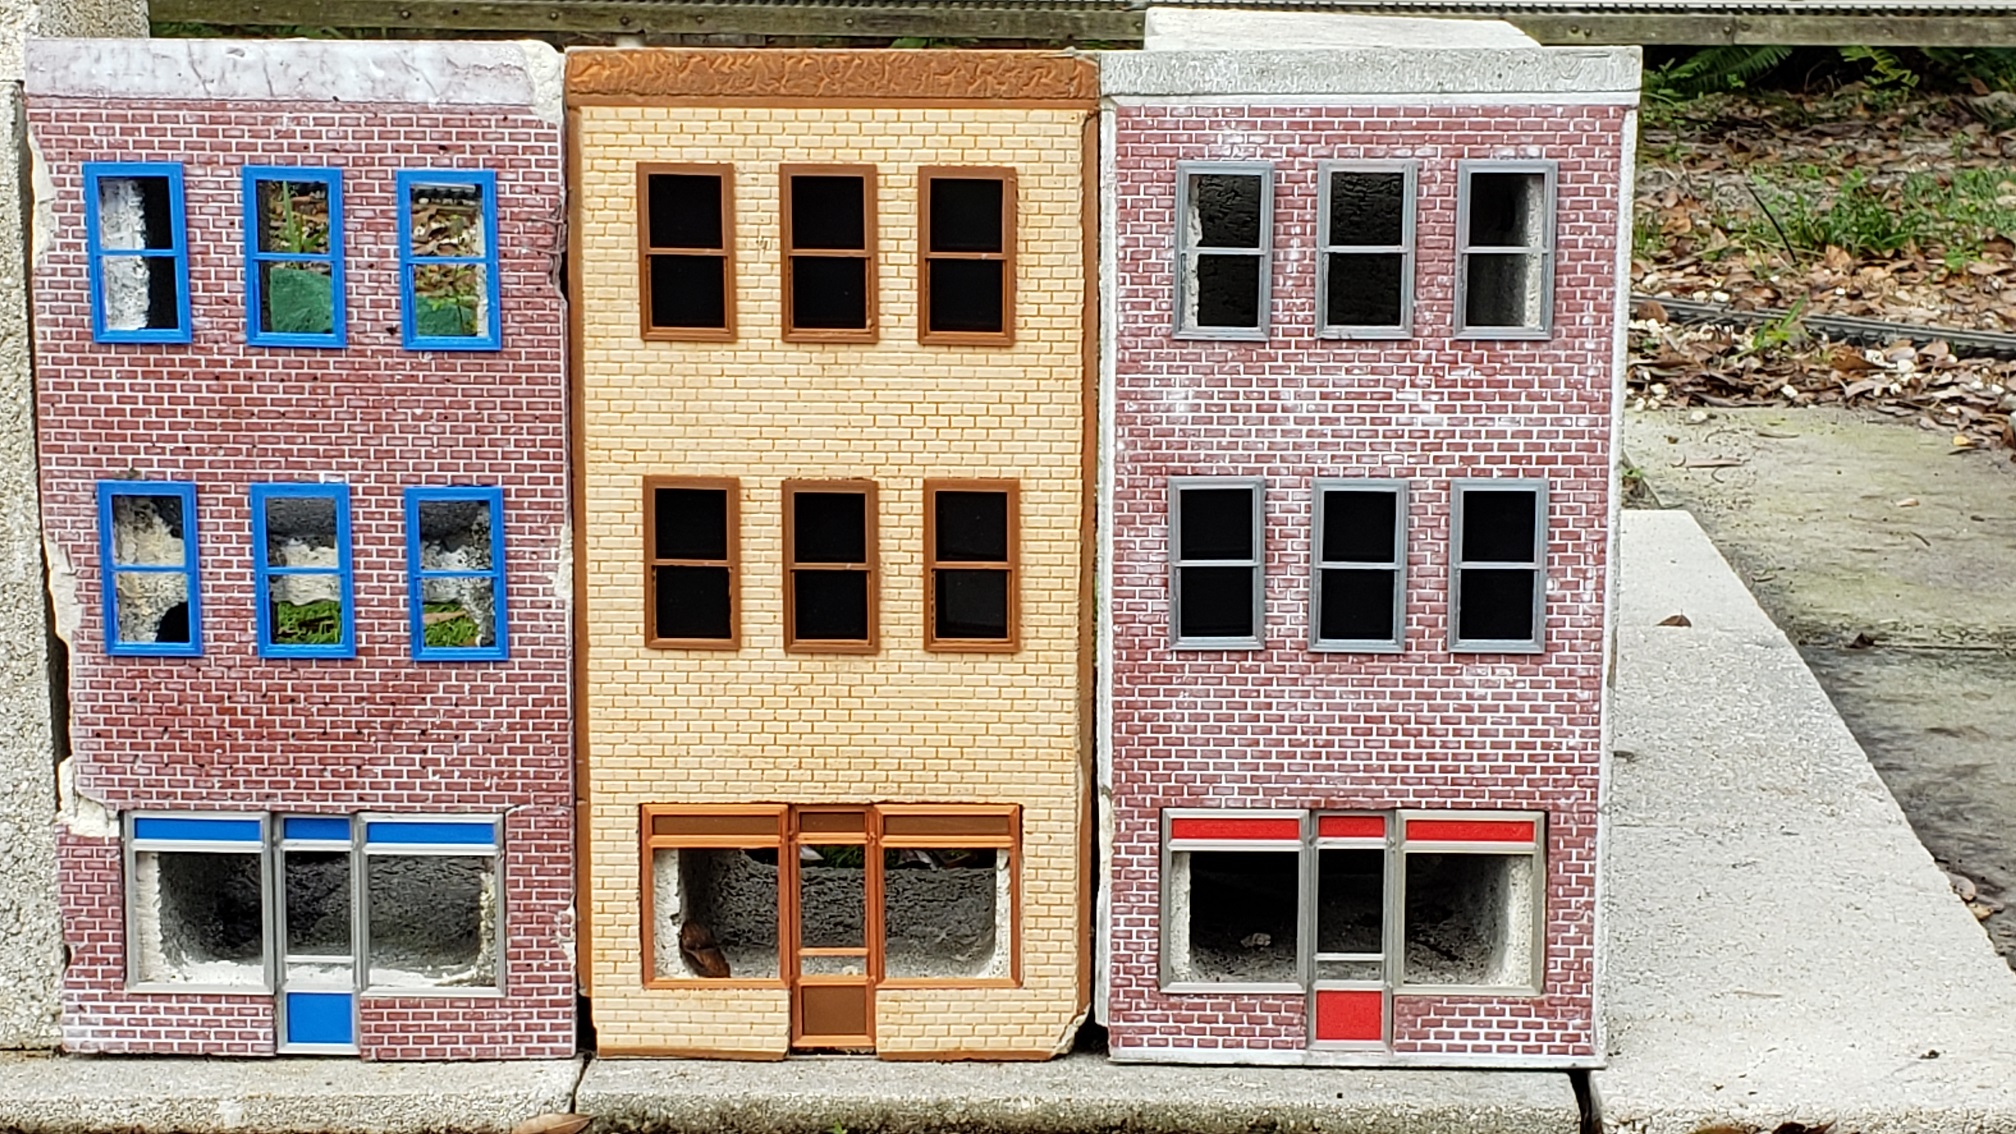
The Featured Image above shows the results of our efforts so far. Below is what we started with… Three very rough castings obviously covering concrete blocks.

Rough Castings
Rough Castings

I’m designing the downtown market display case view blocks to conceal the edges of the concrete block on the first floor. I don’t really have a specific example of a building to model in mind, just a vague recollection from my childhood of what buildings looked like.

The building itself is based on some of the HO kits I assembled ages ago. These kits all start with the same narrow faced three story building, but add different details, like a funeral parlor or a five and dime. The bottom floor is always different, but the upper floors have similar window frames and clear glazing. Even brick patterned blanks are supplied to close off openings if desired.

I’ve already designed the window frames, experimenting with different glazing. With nothing to conceal the concrete block behind, it was obvious something was needed. First I cut some opaque black ABS to fit behind the frames. It definitely blocks the view! But unfortunately, it also means lighting is out of the question!

Downtown Marketplace Windows

In the Featured Image, the building on the right shows the different between nothing behind and black ABS. The building in the middle show what the translucent green looks like compared to the ABS. None of the building have the display case view block installed yet. See the end of the post for a view of all everything populated.

I’m also trying out the “see through” dark green filament I bought, as a stand in for the soda glass of the day, or perhaps tinted glass on automobiles. Hopefully. It’s a little dark for the window glazing, but looks better than the clear filament, which is anything but clear. Translucent perhaps, but it just looks too white and opaque.

When I had just the black ABS cutouts behind the frames with no glazing it looked better than the translucent “clear”. And now the new translucent green looks better than the ABS view block. I need to experiment with back lighting and see if it still looks as good.

Even my “venetian blind” modification doesn’t look like anything but opaque white! It works only slightly better with the translucent green. Perhaps once it’s backlit it will look like blinds covering the inside of the windows. We shall see…

Downtown Marketplace Window Glazing

Iterations and Alterations

Just as the window frames underwent a number of modifications, so did the design, fitment, and assembly of the display cases. The original casting is meant to have two display cases behind large, transparent windows, one on either side of the entrance which is placed in the middle between the two.

The entrance represents a metal framed door with a transom above, typical of the era. For variety, the transom can be fitted with a more modern air conditioner. For now, I’ll concentrate on getting something there first. Details can be added later.

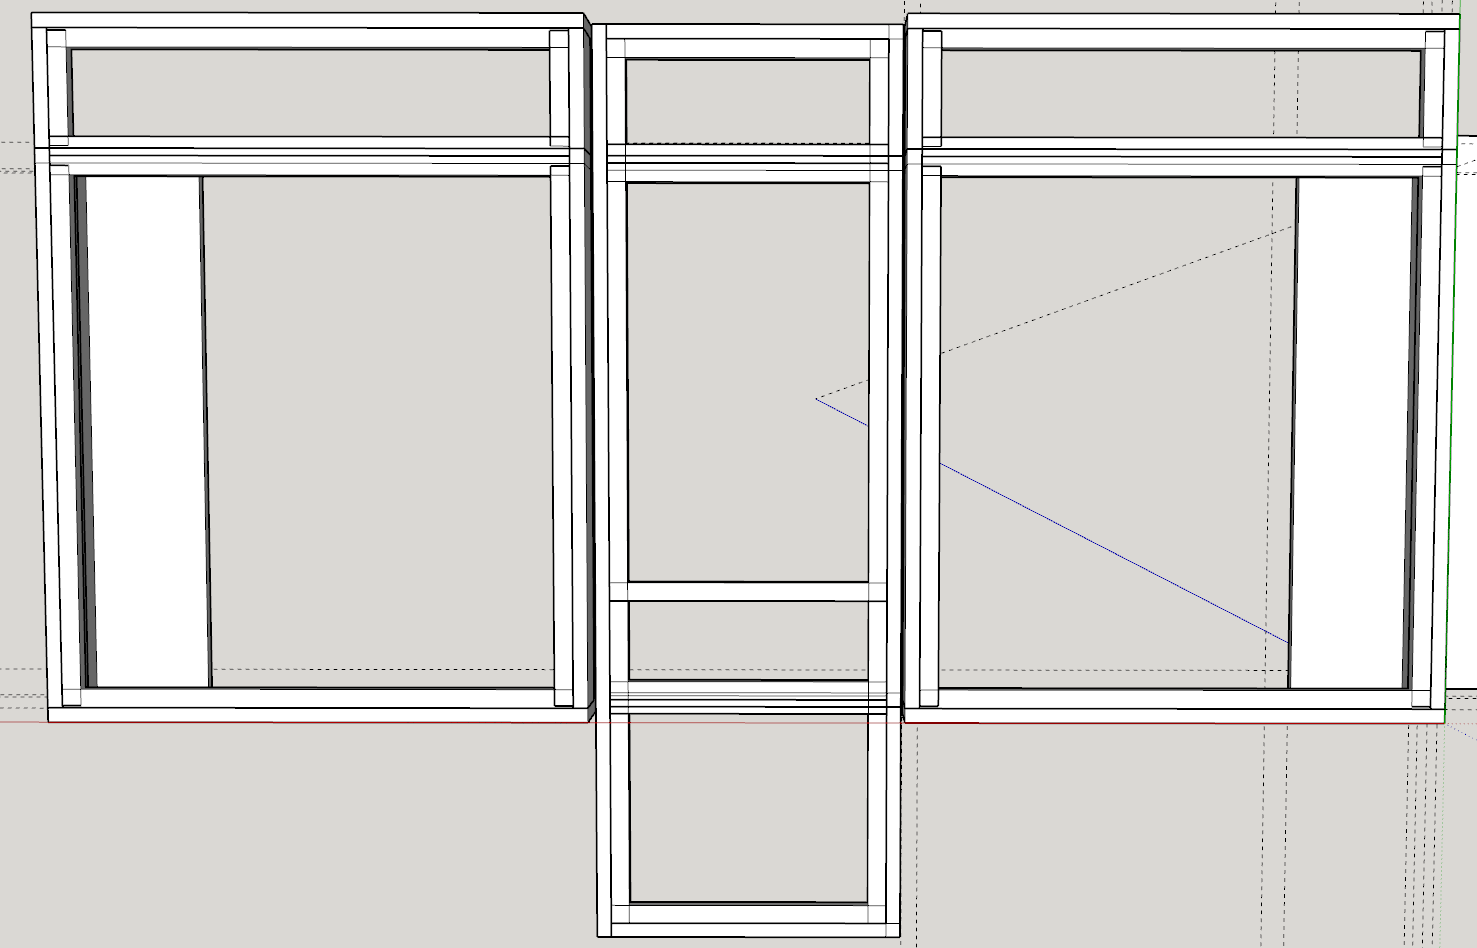
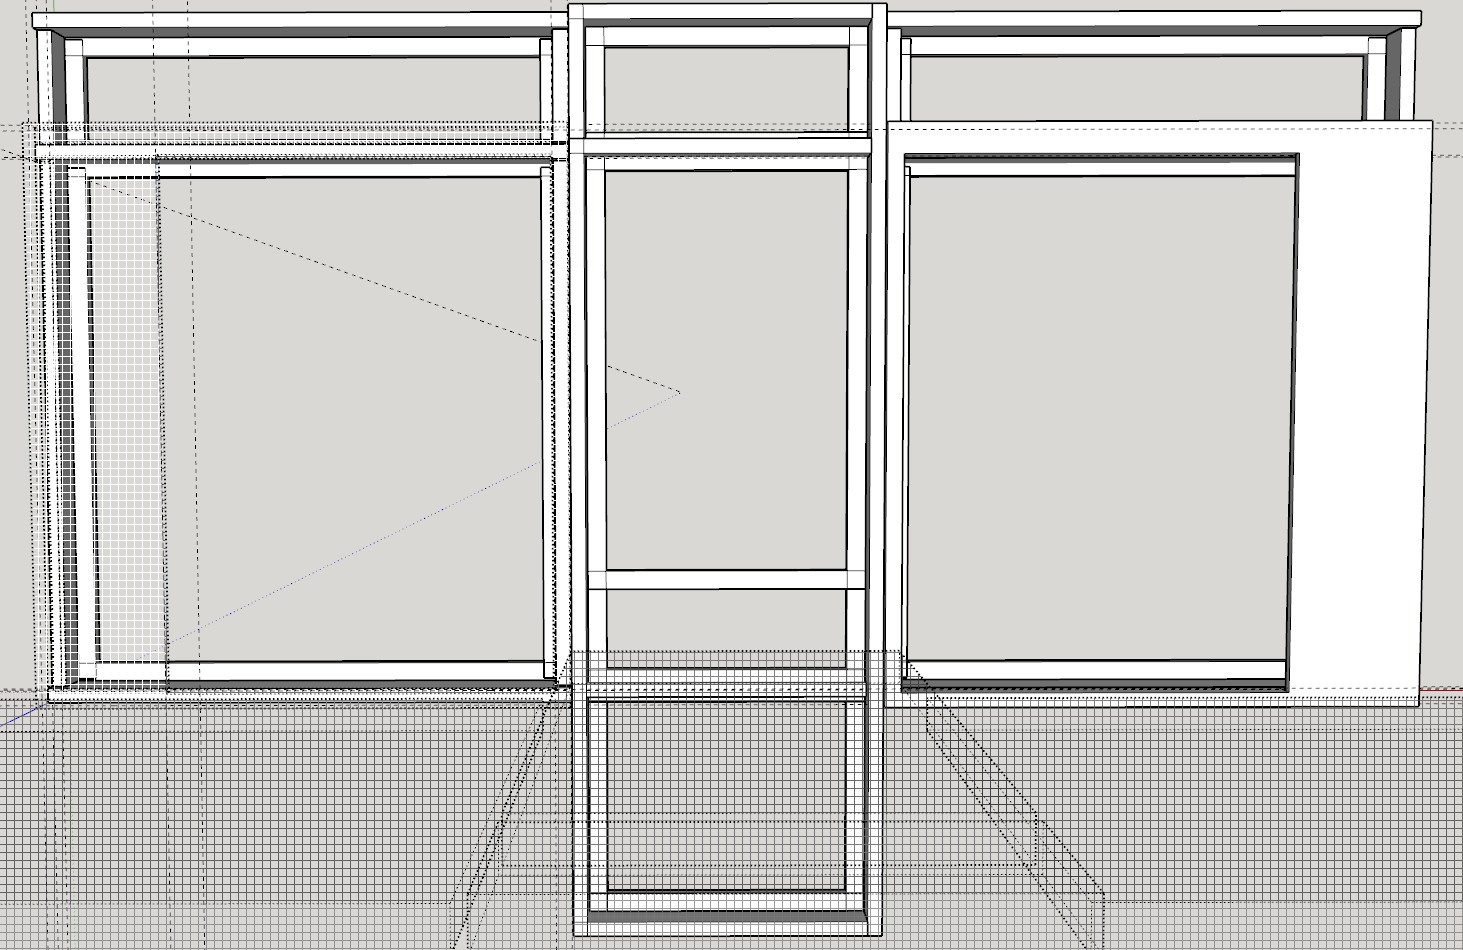
The entrance will be assembled from the three pieces previously described, due to limitations of 3D printing. Overhangs are a no-no. They can be overcome using supports, but it’s more work to clean up the traces left behind by them. The tradeoff is gluing the pieces together, but how to glue them together? We need something to glue together first…

Printing Storefronts

The beauty of the design’s symmetry is both display windows are identical, allowing both sides to remain a single, interchangeable assembly. Together with the door assembly, they can fill the void of the street level opening meant for them.

I recently purchased an assortment of “metal” filaments for the 3D printer. I’m hoping the silver looks enough like an aluminum frame to pass as metal. Even just the standard silver (gray) filament will look enough like an oxidized galvanized finish, so it’s not really a problem if it doesn’t. It still looks better than nothing!

I already printed window frames using the plain silver gray filament, so I print a set using the silver metal filament first. The showcase frames have a place for colored insets above both the door and windows, as well as the bottom kick panel of the door.

Rather than print the insets in the gray color, I decide to use red to make it “pop”. I refrained from printing more window frames in red for fear it would be overpowering against the brick red of the casting. The gray will work well enough for now.

But the real test will be the copper color! I’m thinking about using it for the cream colored brick building, together with brown inset panels, to really make it “pop”! I can’t wait to try it, but wait I’ll have to.

Assembling The Storefronts

My first prints of everything need revision! The frames don’t fit together the way I want them to without a redesign. Even then, the next version still needed some judicious filing, but that left the fit too loose. Even the insets don’t fit!

I quickly learned I need to leave about 0.010″ clearance between pieces if I want an exact fit, and by exact I mean almost an interference fit. I reprinted the insets and this time they almost “snapped” in place. I say almost because they are just loose enough to find their way back out on their own.

So not only do the frame pieces need to be joined together, the insets will need something to retain them in place as well.

Plastic Welding or Plastic Cement?

Even though we’re talking about adding details to cement blocks, the plastic cement we’re talking about is like styrene model cement, the kind that chemically dissolves the plastic together to create one solid piece once it flashes off.

I’m not sure what glue works on PLA. Acetone works for ABS, and supposedly for PLA too. A quick test says I don’t know what they’re smoking, but it has no effect. Model glue does a little better, but still leaves a lot to be desired. That’s not working. Next. I read good reviews about using a plastic welder, so I decided to buy one and try it.

The ones most recommended double as a child’s “toy”, but I’m not sure what parents would hand their grade schooler a hot melt glue gun these days. That’s basically what it is, except it uses plastic filament for 3D printing instead of glue sticks. And at 210°C (410°F) for PLA, it’s about twice as hot. May as well hand your kid a soldering iron at that point!

When it arrived, my first attempt at plastic welding two parts together worked, but with mixed results. It effectively joins the parts together, but the joint isn’t very strong. And like welding metal, it leaves a visible bead of material at the joint. Let’s just say it doesn’t look like a stack of dimes…

After assembling the first storefront, I am thoroughly discouraged by the results. Even though I was able to keep the ugly weld bead hidden from sight, it doesn’t hold the assembly together long enough to press it into the opening in the casting, quickly snapping apart!

My assumption that it physically heated both parts to welding temperature while adding filler material was not a good one. It basically melts only the filler material. There is no molten “puddle” of material like metal welding.

PLA Cement a.k.a. Dichloromethane

A bit more research finds that dichloromethane is the solvent I’m looking for… a.k.a. chloroform. Great. Now where do I get that? Even after all the “Does this rag smell like chloroform?” jokes, it’s surprising how many products use it as the main ingredient! Methylene chloride was widely used as a paint stripper, now both are banned banned, replaced by a far less effective ingredients.

Just be bopping down to the paint department at the local big box store sounded like a good idea at the time, but they no longer carry methylene chloride, let alone in those gallon tins. Guess I should call myself lucky to still be able to buy acetone by the gallon.

What’s amazing to me is there are still many suppliers online. I went with “WeldOn” products, no affiliation. It’s expensive for just a pint can, but they deliver to my door! There are a number of different “acrylic adhesives” in their lineup.

I tried their #16 first, which worked incredibly well on plexiglass, but is really thick. Too thick to seep into the crevices between the parts via capillary action. It works, but has to be brushed on, wasting a lot of it in the process, kind of like using a firehose to water the flowers.

I ordered their #3 and #4 variations next. They are definitely liquid, thin enough to flow into the tiniest of crevices. The #3 is quick acting and the #4 has a longer working time. Both flow easily into the joints. All three should be used only in a well ventilated area or asphyxiation could result.

Along those lines, this stuff needs to be tightly sealed so it won’t totally evaporate away. Both the #3 and #4 came sealed in heavy duty ziploc bags over the sealed metal lid of the metal can! The first time I used it, I found out the hard way how quickly this stuff evaporates!

Learning the Ropes

The small squeeze bottles with attached hypodermic needle that came with them have a twist-lock “cap” of sorts to protect the tip. More like to protect you from stabbing yourself with it, but even that wasn’t enough to seal it. I had a third of the squeeze bottle worth of #3 left in the bottom when I went to bed. It was all but gone by morning!

From now on, any leftover gets immediate placed back in the can and then sealed in the ziploc. I also found the needle to be prone to clogging with the dissolved plastic after a short amount of use. Squeezing it to blow out the clog either doesn’t work, or if it does, floods the work pieces with solvent.

I found a better way to dissolve the clog was just to hold the squeeze bottle upside down until the solvent itself dissolves the clog. It doesn’t take long and it’s fairly obvious when the clog is gone. Hard to ignore the solvent that starts streaming out again. After the first few uses and it taking forever just to get enough sucked up into the squeeze bottle through that small needle, I decided to find some larger versions.

I now have so many of them, I can’t give them away, but the thought was they would fill quickly and I could use them to quickly transfer the contents into the hypo bottle. They came with an attached silicon cap to cover the larger, blunt tip, but even they don’t seal well enough to leave any leftovers inside for more than a day or so. I’ve gotten in the habit of pulling out a little solvent at a time, using what I need, then returning what’s left to the can when finished.

The Test of Time

So long story short, after a few false starts, we finally managed to get those three buildings looking more like a downtown business than a concrete block. They still need modifications to continue to serve us as downtown marketplace buildings though. The elements were not kind to the PLA plastic, as seen in the picture below.

Faded Glory
Time takes its toll on the PLA plastic exposed to the elements

I should have used some adhesive caulk to hold the windows in place too. Slowly but surely the dogs managed to knock out every single window. It got to the point that every time I went out to work on the Barkyard, I had to pick up a couple more windows, just laying in the street or on the ground. I started a collection of them in the garage so as not to lose them.

Next go round I’ll need to paint the plastic with UV resistant paint, maybe even just a clear top coat, but an opaque color will provide far more protection from the sun than clear coat ever could. At some point I really need to get some display cases put behind there though.

I finally removed the ground floor display cases and stashed them away too. Ann says it looks like a ghost town. So we’re thinking of making more castings, enough to build an entire ghost town downtown for Halloween! I’ll need to accelerate my efforts to add lighting and other “spooky” effects, but it should prove entertaining regardless.