
This will be a combination lighting controller and latest acquisition update. It all started when I was searching for a USA Trains GP9 like the one I bought years ago. When I bought the SD40s, I also bought some spare trucks, with the idea of modifying the 4 axle GP9 into a 6 axle SD24. When I first bought the GP9, they were plentiful. But now that I want another, good luck finding one!
The same thing happened with the 2-6-6-2 Mallet. What used to be plentiful was no longer available anywhere. Perseverance paid off. I finally managed to find the Mallet, but so far, no such luck with the GP9. What I did find was a Bachmann full baggage car for both the green and creme “Pennsylvania Limited” set and the B&O “Royal Blue” set.
I was always somewhat disappointed that there were only two cars with our first B&O “Royal Blue” set, so I was really excited to see there was another car that matched them. Beyond that, the three green and creme “Pennsylvania Limited” cars were obviously matched, right down to the combination car only having the creme for the passenger half.

But that left the two solid green LGB coaches looking like oddballs sitting ahead of the combination car. Now with the full baggage car, it will balance them, perhaps as economy coaches? Or the three matched cars can be used for one train while the solid green full baggage and two solid green coaches can make up another train.

More Acquisitions?
Regardless, half of them have our next gen lighting controllers installed, and the other half don’t. In fact, the last car I installed the latest version in was the combination car. I had replaced the existing oversized battery box installation with a smaller version that fit entirely in the original 9V battery case. But let me back up and explain where I was going with that.
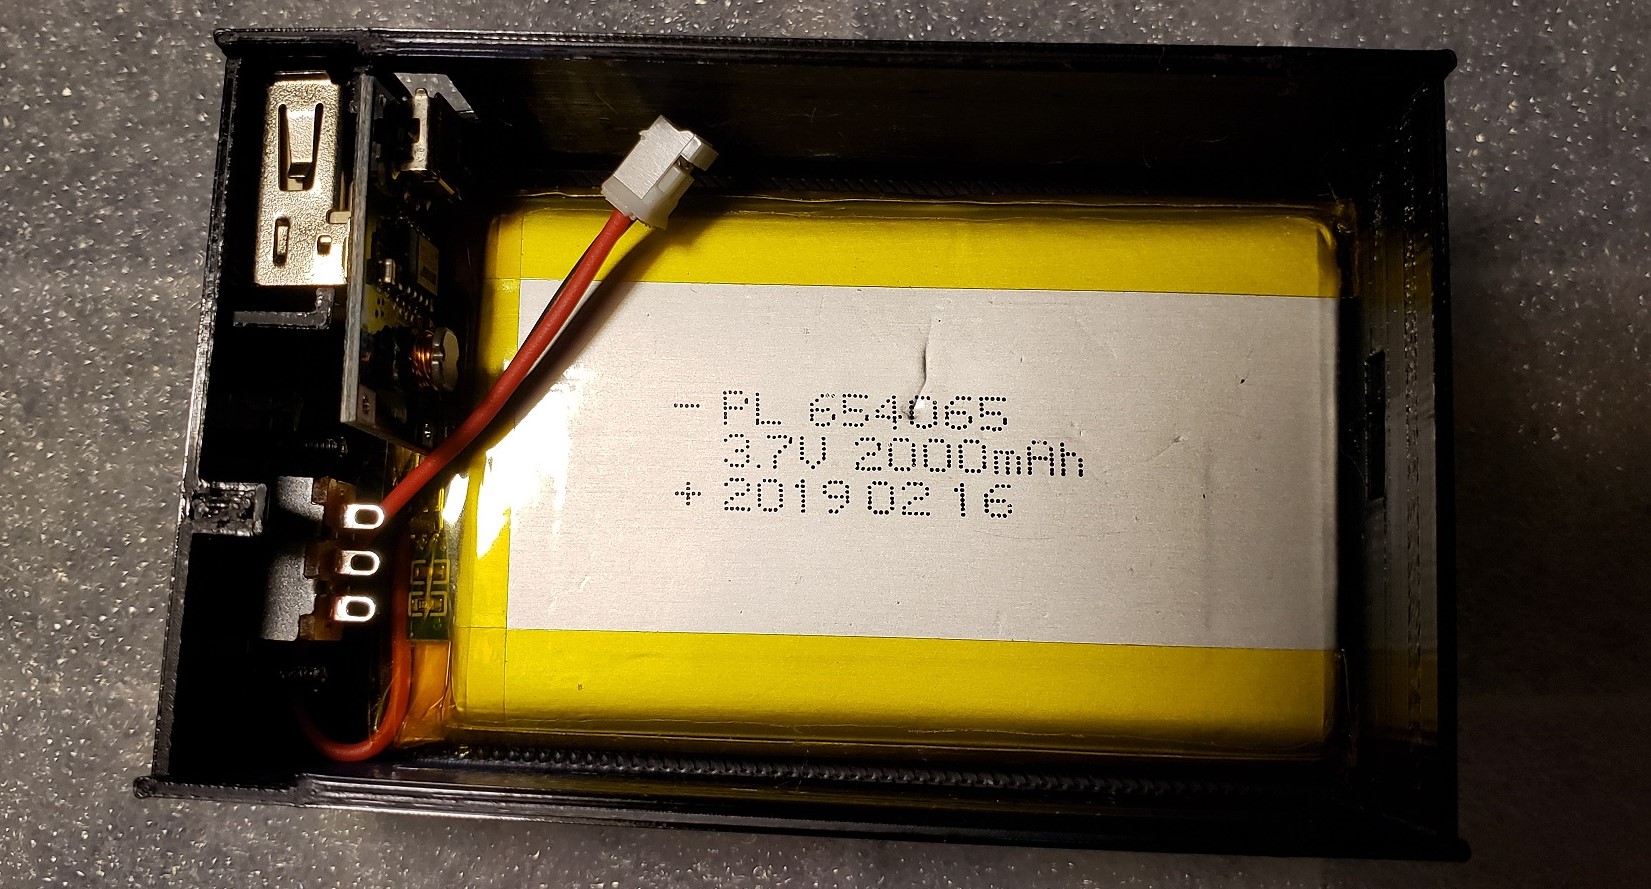
The 3D printed ones work just fine, but we don’t really need 11 – 12 hours of continuous operation. That means we don’t really need that size battery either. Some of them boast 2800mAH while others just 2000mAH, that is to say they’re labelled as such. Then again, I’ve seen 2000mAH 18650 cells labelled and sold as 5000mAH too.
The oversized, 3D printed battery box that replaced the original 9V battery case in the first and next gen designs was specifically designed around that battery size (654065, or 6.5mm x 40mm x 65mm), just slightly bigger than the outline of the original 9V case. So the thought is what if we can find a smaller battery that will fit, along with the electronics?
I found a number of smaller batteries that will fit in the original case. There are 750mAH, 850mAH, and 1000mAH candidates in various form factors that fit. I bought a handful of each to test with. Turns out the 1000mAH battery fits best, which is nice since it will give us the longest run time as well.
More Lighting Controllers?
The 1000mAH battery fits nicely, with room to spare for the battery monitor/charge circuit board, and an Arduino Wemos D1 mini (ESP8266). Unfortunately, I’ve had nothing but problems with them! From issues with Windows drivers not being able to upload new program versions to failure to serve the web page files reliably via WiFi once programmed.
When they work, they work well. When they don’t, which is most of the time, it’s very frustrating to say the least. Already short on time, I don’t have any extra, let alone two weeks for messing around with, “Why doesn’t this blasted thing work now?” Until the latest round of Windows updates, at least my laptop was able to communicate with their CH340 chip. But no longer!
There has to be a small form factor Arduino that’s much more reliable than these pieces of… junk. I try to keep up with the latest innovations, but with the time constraints already mentioned, can’t be as thorough as I’d like. Thankfully Nick found these “super mini” versions of the ESP32C3 and ESP32S3 Arduinos, even more tiny, and more powerful.

Nick had sampled some and gave me a C3 and an S3 to experiment with after telling him my long, sad Wemos D1 story. But my hopes of having a quick fix quickly disappeared after trying to compile the code for the new C3 target. More time chasing gremlins, or in this case, yet another way of doing the same thing in the same family of parts!
More Problems?
How many different ways can they screw around a simple watchdog timer reset function? Apparently as many as the number of different types of ESP32 that exist. My code is now full of #ifdefs around every chunk of code for every different type of Arduino used!
If you’re not familiar with the concept of an #ifdef, it’s a way of including or excluding parts of the code based on whether a flag is defined or not. In this case, #ifdef ESP8266 vs. #ifdef ESP32 vs. #ifdef ARDUINO_ESP32C3_DEV vs. #ifdef ARDUINO_ESP32S3_DEV vs… You get the idea.
After yet another week of fumbling around and refactoring code I was no closer to anything that worked. The lighting controller is based on the FastLED library for the addressable LED strips. Without getting into too much detail, it forces the user to declare what Arduino pin to use at compile time, meaning it can’t be configured later, at runtime, from a config file.
After spending even more time searching issues around using the FastLED library with the ESP32C3, I found a number of different threads with people saying the C3 doesn’t have enough horsepower to handle FastLED and WiFi, saying it can barely handle WiFi! Great! After all this, I still don’t have a working model. But at least it can serve up the revised UI…

Squashing Bugs
Some of those folks recommend using the Adafruit NeoPixel library instead, so in the process of bringing together all the next gen and latest Arduino technology, I decided to refactor our LEDInterface to add yet another type that uses NeoPixel instead of FastLED. But even after the switch, still nothing! I’m beginning to think I’m cursed.
I added reading pins and such from the config file as well. In the process of debugging why it couldn’t correctly pull the default color, I stumble across the issue. Rather than duplicate code, I decided to share the piece that converts a CSS string color value into the red, green, and blue components to set the LEDs to…
Except it always returns black when using the hexadecimal #rrggbb form! For example, the color of the amber glow of those kerosene lamps is coded as #140600, i.e. red = 20, green = 6, blue = 0. But I must have missed a line when combining the two functions because it always returned black (0, 0, 0) and not amber (20, 6, 0). Yep. You guessed it. It was working all along!
Confidence restored, I even found a way to workaround that FastLED limitation of having to know the pin at compile time! You just ask for all of them, then select the one you want to use at run time based on the config file value! Another ESP32 “breaking” change was in the ledc interface, rendering all our code for the 5050 PWM LED strips useless. So I fixed that too.

The Latest Evolution
So when we talk about the “latest evolution”, we’re talking about replacing the already small Arduino NodeMCU 12E and Wemos D1 mini boards with these even more tiny, more powerful, “super mini” Arduinos. I’ve been working with a larger version of the ESP32S3 to experiment with I2S sound! I’ve totally reworked to old MP3Player sketch to use I2S and have a working prototype!
If you’re familiar with our “Themes” option, you may have noticed we’ve added a few new ones here. If not, they’re accessed by clicking on the Themes button, which presents a list of the various predefined color schemes based on different railroad liveries to select from. For example, a Pennsylvania Limited Green and Cream scheme didn’t exist. Until now.
We already had a B&O Gold, Blue, and Gray scheme for more modern F units, but we had to create an entirely new B&O Royal Blue scheme. Clicking the desired livery in the list presented sets it as default color scheme for the UI to use. If that sort of thing isn’t important to you, that’s fine. But it’s important to me, and it’s easy enough to add new liveries as desired.
Beyond that, early testing of the new 1000mAH battery yields more than 4 hours of operation. Compared to that, I’d say the 2800mAH markings were closer to the mark than the 2000mAH, but that frees up those batteries for other things, like sound!
I’m really excited about the latest evolution and the ability to add lighting to these Bachmann cars using the original 9V battery case. With just a few mods to add a power switch and charging port, all the electronics fit! And that’s a good thing too, because those other two Royal Blue cars still have the original incandescent bulbs, just begging for an upgrade!
What’s Next?
It would really be nice if we could recharge the battery from track power. Trying to access the charging port in the side of the battery box on the underside of the car can be difficult. I usually end up having to lift it off the track to be able to plug in the USB charging cable. But none of the passenger cars have track power pickups anyway. They would have to be added.
It’s really more for equipment that already has power pickups installed, like the USA Trains “cabeese” that still rely on the archaic 9V battery. Unfortunately, they’re internal and it takes some doing to gain access to replace them when they’re dead. Wouldn’t it be nice if that track power could recharge one of these LiPo cells instead?
But that’s a project for another day. I think I need to get the infrastructure back into running order before I worry about something like that!
Stayed tuned. More to come…