We got the Halloween decorations down from the attic the last weekend of September, before we even knew about the offer on the other house. Ann decorated the house and I decorated the office. I had a couple of glow in the dark skulls that had been sitting over there in the corner room for more than a decade. With the CFL black light bulbs in place of the standard lamp bulbs on either end of my desk, both those skulls glow brightly!
But that was just the beginning. Having to replace the burned out bulb in the skull candelabra, I decided to buy more of those neon “flicker flame” bulbs. Good choice. Now the eyes flicker too! Then I ordered more and replaced all the incandescent bulbs in a twenty light string with them and strung them around the book cases in the office. And while I was sitting in a meeting, I modified the closet lighting test jig to add Halloween lights.
And no, this isn’t yet another lighting post. Well, it is, sort of… I merely modified the configuration and HTML enough to make a string of orange, eerie green, and purple colored lights that flicker together. Kind of spooky, but Ann wasn’t impressed. Her only comment was they looked pink, not purple. Thankfully a quick and easy adjustment to configuration values to add a bunch more blue and now they definitely look purple.
For My Next Trick…
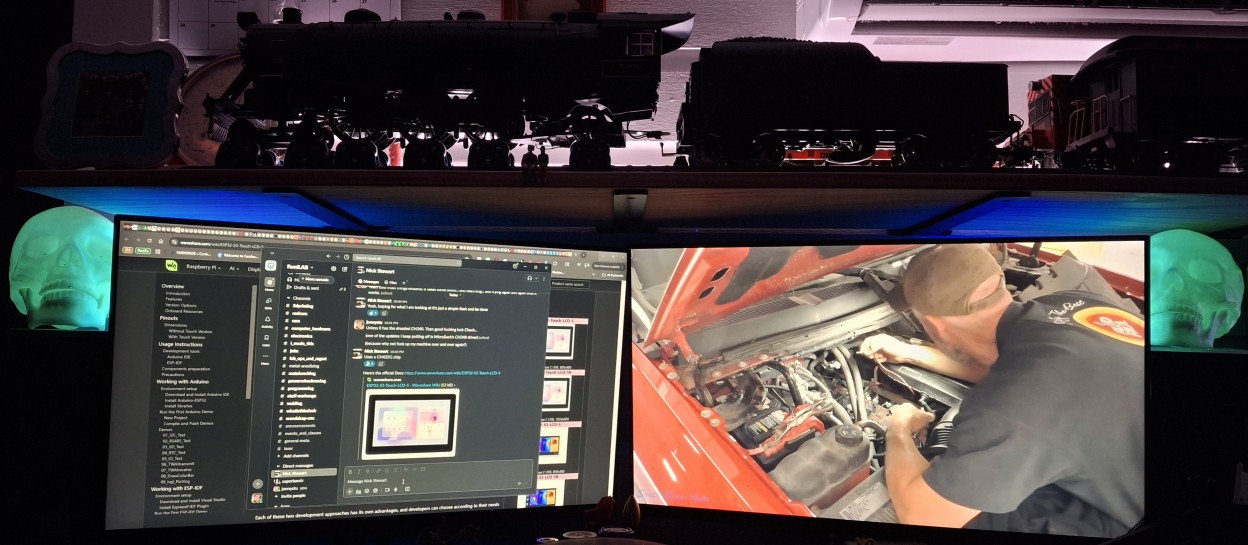
Having those glowing skulls sitting on top of the speakers on either side of my desk got me thinking about what else I could do with the glow in the dark 3D printer filament and some UV LEDs. Nick and I were chatting on Slack one night and he sent me a picture of a plastic ghost flipping me the bird, from an ad, that said it was supposedly holding candles. If I try hard enough, I can convince myself those might be candles, but always saw it flipping me the bird first.
It’s funny, because the very next day I saw the very same ghost in one of those Chinesium store ads I get in my email daily. Ann had seen another skull candelabra at the Antique store down the street from us, but didn’t buy it. I asked her why not, but it doesn’t matter, she didn’t. I was telling Nick I’m thinking if they still have it, I’d go buy it. With an old white sheet and a couple of 3D printed “candles”, presto, bird flipping ghost.
We were out to eat the other night at the restaurant just next door to it, so I asked if we could walk over there afterward and see if they still had it. They close at six o’clock, so I figured we had plenty of time. Ann went to pull the door open, but it was already locked? And it’s just now quarter ’til six! A girl came to the door and said they lock up 15 minutes before. Ann told her in that case they should change their sign to 5:45 instead of 6:00.
The “Flip Off” Ghost
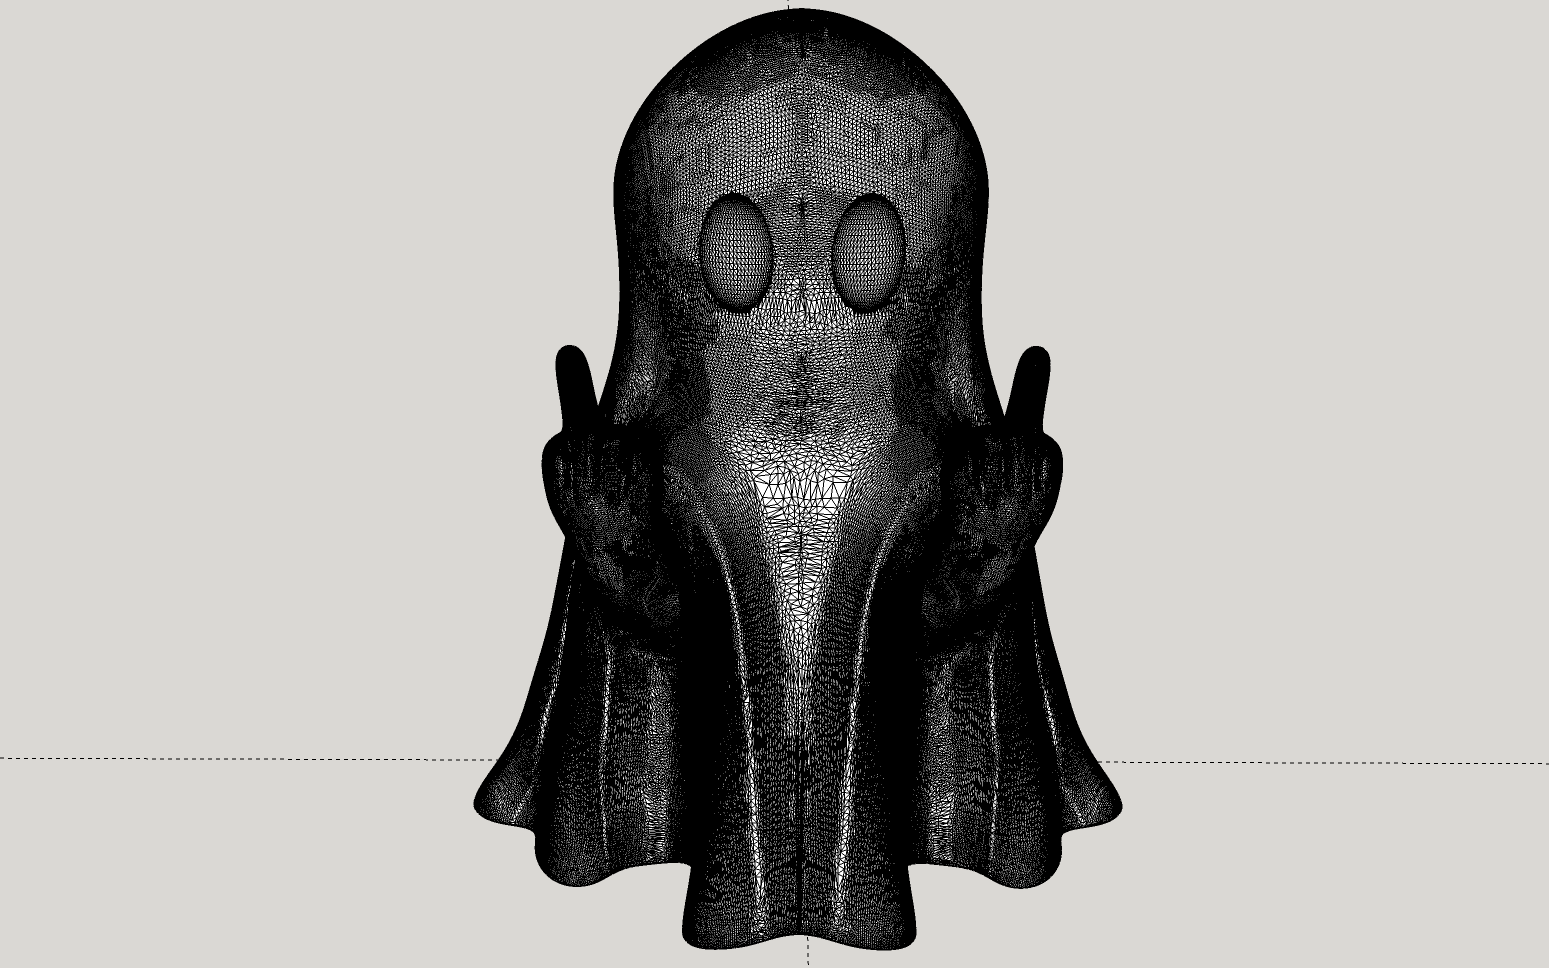
The antique store could have made a quick sale, but their loss. F… ’em! And the broom they rode in on! That’s alright, Nick found someone had actually created an STL file to 3D print a ghost flipping the bird with both hands and sent it to me. Both 3D printers had been sitting idle for a couple weeks with all the higher priority things that came first to be able to list the other house for sale. Time to wake them from their slumber.
I pulled the STL file into the slicer, Cura. It said 2 days 11 hours to print it! I about fell out of my chair! Then I realized it was still set for 100% infill. Dropping it back to the standard 20% infill says more than seven hours. Still too long. Scaled down to 50% of original size and now it says a bit over two hours. That’s better. I already had what’s left of a spool of white loaded in the old printer and kicked off a print.
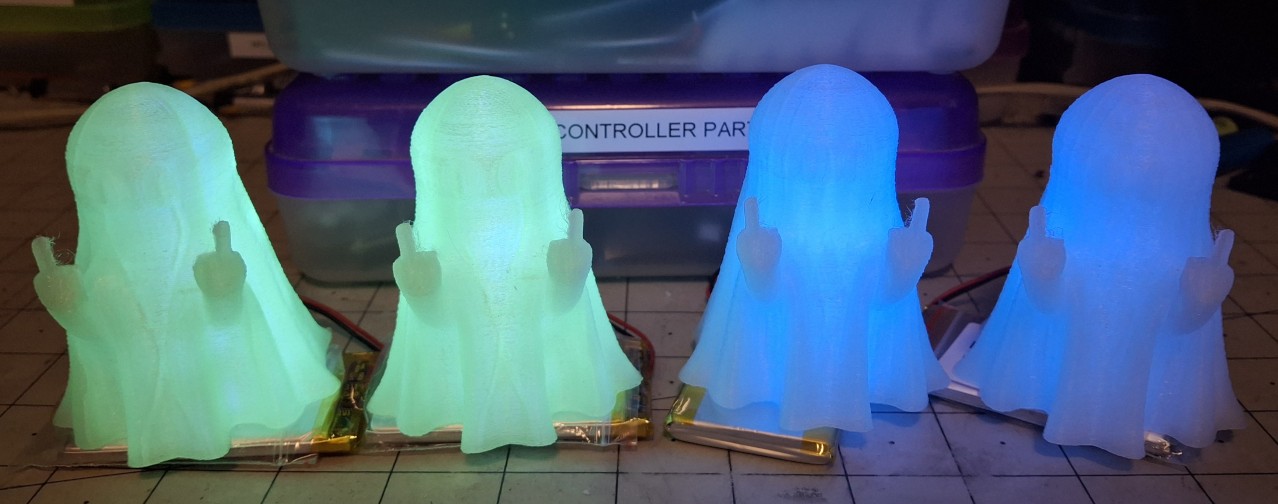
The first print came out great, so I printed another one. Now we have two half sized “Flip Off” ghosts sitting on the tea table beneath the skull candelabra. I grabbed the mini spool of glow in the dark blue filament off the shelf, ready to make some more prints. Before long I had two more ghosts, but this time in glow in the dark blue!
All Things Must Glow – In The Dark!
Back when I bought my first 3D printer, my first venture into ultraviolet (UV) light emitting diodes (LEDs) was my “Glow In The Day” clock project. I’ll save the details for later in the post, but like any prototype, mistakes were made. One was printing it way too thin, the plastic face splitting into a flap where the clock movement is mounted. More pertinent to this discussion was the selection of outdoor, 12 volt UV LED strips.
The decision to use 12 volt LED strips rather than 5 volt ones adds an extra part to boost the USB supplied 5 volt power to 12 volts. These “half pint” ghosts are barely 3″ (76mm) tall. Where would I hide that part? With lessons learned, I searched for 5 volt UV LED strips and found a large assortment. Some with battery boxes for three AA batteries. Some with an additional USB pigtail adapt ed to the battery box. Some with just a USB pigtail and an inline switch.
I ordered all three to see which works best. The latter fits the bill nicely. Initially I left the strip wound on the spool. I quickly found out that was a big mistake after the LEDs became too hot to touch and the spool began to deform. Oopsie! Time to unwind. The LED strip from the spool that is. That turned into a win when I realized I could use the drill to clear out an internal passage and just insert the end of the LED strip, now free from the spool.
Ghost Factory
Perfect! That’s exactly what I was looking for. The entire ghost glows from the inside out. Before long I had the two blue ones rigged to glow from a dedicated battery, along with two new green ones I printed while working out how to add the power port to the blue ones. I noticed the 20% infill creates many very small cavities where I wanted fewer, larger ones to more easily insert the LED strips.
Reducing the infill to 5% reduced the print time even more, barely an hour and a half. It also provided the desired larger space for the LED strip. Much larger. Now it only takes the drill a moment to penetrate the bottom layers and work a slot along either face of the infill grid. Some quick work with an Exacto™ or one of those snap off knives and a triangular opening is ready for LED strip insertion.
I was back and forth whether to use a USB micro breakout board or a battery port. I have so many spare LiPo batteries, they can power them for now. They use a standard JST PH (2.0mm spacing) connector. There’s only room to fit four LEDs per strip in these half pints, so adding a battery connector to the back then feeding the wires from the connector to the LED strip makes for a very simple build.
It takes longest to reshape the drilled hole into a rectangular opening that fits the battery connector shroud. A bit of hot melt glue to secure it and all that’s left is to cut the wires to length and solder them to the LED strip. Maybe five minutes per ghost once I’m on a roll. Definitely far less than the hour and a half it takes to print them. The best part is they continue to glow even after the power is removed!
Rainbow Colors
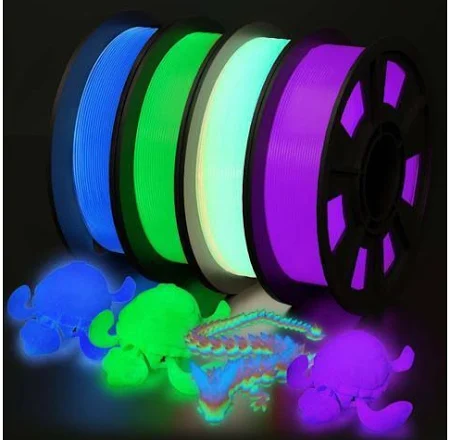
When I was searching for 5 volt UV LED strips, I also looked for other glow in the dark filament colors, other than the green and blue I already have. I readily found red and purple available and bought a 1kg (2.2lb) spool of each. Orange and yellow are also available, but it appears the glowing orange starts out as yellow and the the glowing yellow starts out as green. I’ll pass on those for now. The purple arrived first, so I loaded it into the new printer.
The online picture of the purple filament shows it as more of a fuchsia color, but in reality, it just looks purple. Strange. It glows pretty much the same purple color too. Soon there were a couple more of the half pints in purple ready for LEDs. I kicked off a full sized print in purple while I installed the “guts” in the other half pints. He’s a big one! About 6½” (165mm) tall and 5″ (127mm) wide at the base. No wonder it takes seven hours to print!
The infill pattern in the full sized ghost forms a diamond pattern in roughly the center of the print. I made an opening into the forward facing section of the infill. Testing with the lit UV strip inserted, it’s obvious I’ll need more than one strip. I’m thinking four strips, each facing in one of four cardinal directions. Think north, south, east, and west. Each strip is also nine LEDs compared to four in the half pints.
That Will Teach Me
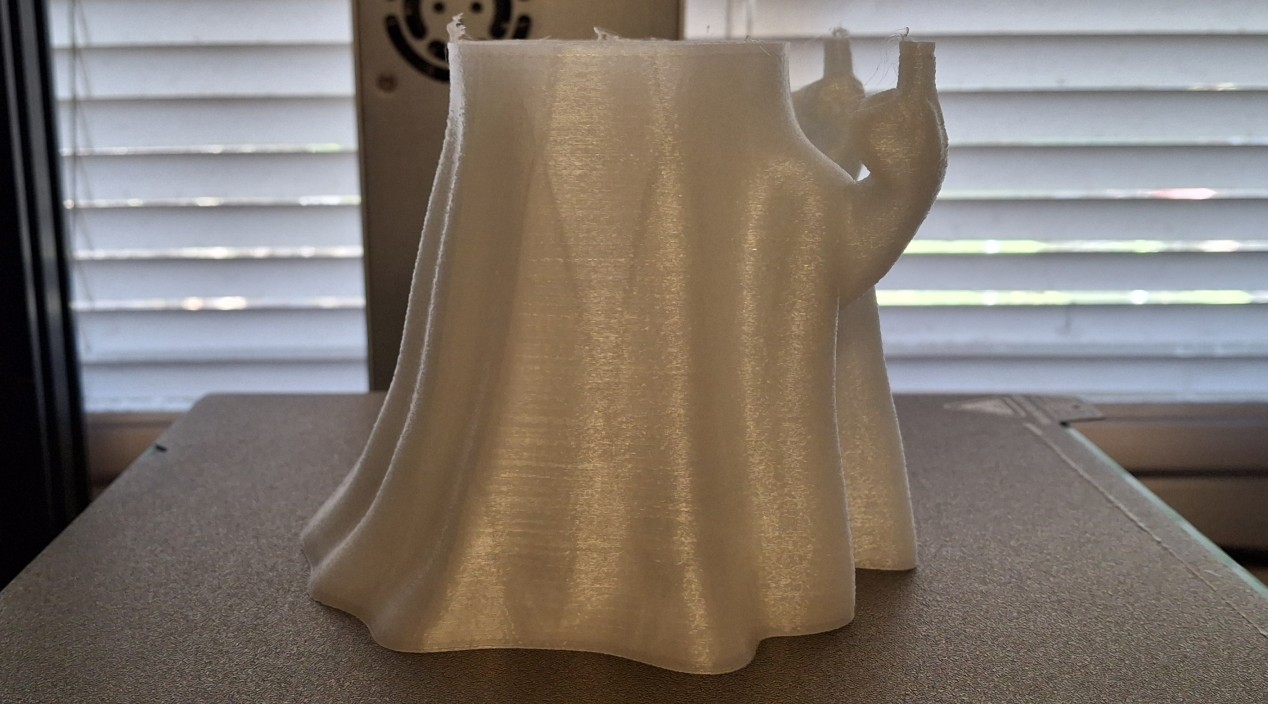
With what’s left of the glow in the dark green still loaded in the old printer, I kicked off a full sized print, convinced there was enough filament to complete the job. I stayed up past midnight, checking there was still enough filament left, thinking I’d just pause the print if it ran out and swap in the new spool sitting on the shelf. There’s also a new spool of blue next to it. Thinking I could keep checking on it, I dozed off. Big mistake.
By the time I woke up, the print had “finished”, but the result was a “decapitated” ghost. Bummer. Not the end of the world, but I’m not sure how I can print just the remaining portion of the head and those two amputated fingers. Problem for future me. I did measure how tall the print was before removing it so I’d know where it left off though. Nick asked if I captured the time lapse since it would show the exact layer. Nope. Not this time.
By now the glow in the dark red filament arrived. It’s time to fill out the roster and print some red ghosts. But that will have to go in the old printer. I’m working on a music stand for Ann’s new to her keyboard. I took a bunch of measurements to get me started on the design, consisting of two assemblies, the mount and the music stand itself. The idea is to attach the mount to the keyboard in a sturdy fashion, then attach the music stand to the mount.

Yet Another 3D Printer Failure?
I swapped the white filament with the glow in the dark purple in the new printer, printing the pieces for Ann’s music stand. The first problem I ran into was that damned Z-Offset was somehow out of adjustment again. This has been a long standing issue with this printer, ever since I first bought it. But I think I finally figured out why it keeps happening. The Z-axis is dual drive. But I think the issue is me being in a hurry and man handling the print head.
Sometimes I just twist one of the Z-axis leadscrews to rapidly adjust the print head height. Other times I just grab the print head itself, pushing down or pulling up on it. I think the print head mounting bracket to the X-axis gantry is just thin enough that it bends, ever so slightly, when I move it by the print head. In the future, I’ll remember to twist the lead screw and not touch the print head. We’ll see if it happens again.
It’s only off by 0.4mm (0.016″), but that’s enough that the first layer won’t stick to the build plate and make it look like it’s under-extruding. I’ve been keeping a history of these magical Z-Offset adjustments and we’ve come full circle. Originally it was 3.3mm, which slowly evolved into the last adjustment to 2.9mm as of August 7th. Well, now we’re back to the original 3.3mm on October 18th. It’s a tedious process and takes multiple cancelled prints.
Ghost In The Machine Or Software Bugs?
Anyway, as I’m dialing in that last piece to test fit that keyboard mount, the printer starts acting up. The first version of that piece was too short. After a quick adjustment to the design, it’s still too short. Another adjustment and the printer just won’t function properly. It keeps stopping mid print, moving the print head off the front corner of the build plate and extruding filament, as if trying to clear a clogged nozzle.
It’s done that before, not often, but usually after cancelled prints. The more I try, the worse it gets, failing sooner each time. I finally gave up and just shutdown the printer and the Raspberry PI running OctoPrint that controls it. Thinking about it, I was prompted whether I wanted to install a new version. Usually I wait, but this time decided to update both the old and new printers’ OctoPrint controllers. Bad idea.
I’m pretty sure this new version of OctoPrint is the problem because even the old printer is telling me every file upload fails, every single time, when it works and prints the file just fine. And all of a sudden I can’t upload a file to the new printer unless I use the file manager. Clicking the Upload button has no effect. Can’t create a new folder either. It just refuses to respond. I’ll have to see if there’s a way to revert to a known good version.

Moving On
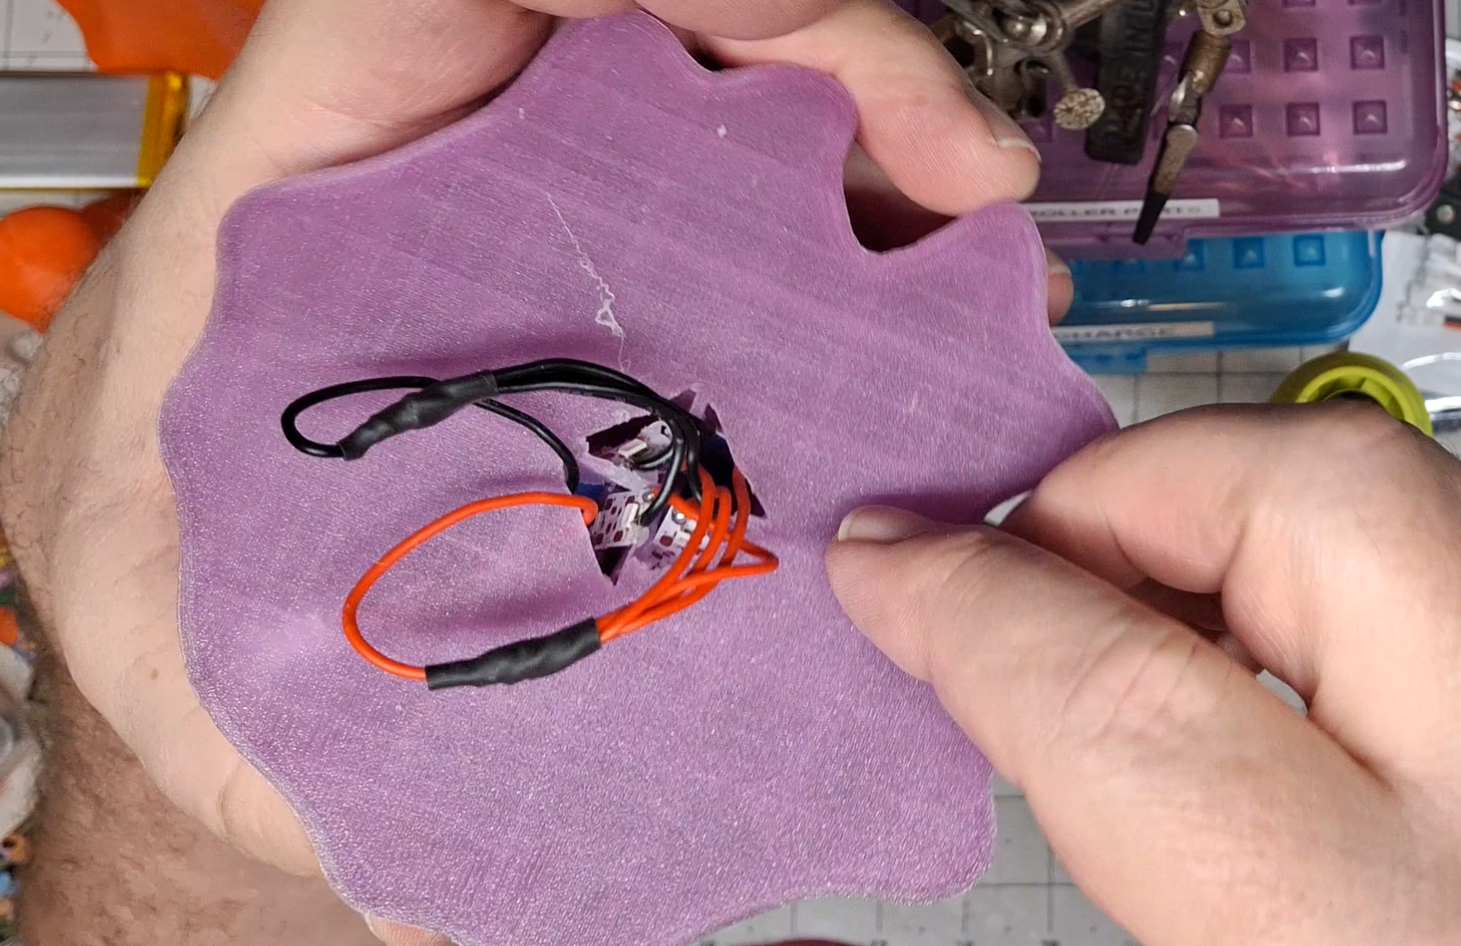
Everything was working great, until it wasn’t. I’m disappointed I can’t move forward with Ann’s music stand. Having the new printer offline is annoying, but thankfully the old one still works. And it’s out of filament, so time to load the glow in the dark red that just arrived and get printing. Again, a couple half pints, then a full sized ghost. I decided to prototype the full sized purple ghost while those printed, capturing the process on video as I went.
It’s definitely a trial and error process. Even though the end result glowed the way I wanted it to, I’m not real happy with wires hanging out the bottom or the difficulty I have getting four wires to cooperate long enough to solder them together. Twice. Once for plus and again for minus. Then connect them to the battery connector. In other words, it’s going to need work. But that’s what prototypes are for.
Time to print a full sized glow in the dark blue ghost. The red gets swapped out for the remaining blue filament. There should be more on this spool than there was on the green spool, mainly because I printed a number of glow in the dark features for two of those “Glow In The Day” clocks. Now whether there’s enough to completely print a full size ghost or not remains to be seen.
That Should Have Taught Me
Well, that was another bad assumption. You guessed it. It ran out of filament before the print finished. But this time it ran out even sooner than the green spool did! How is that possible unless they short changed me on the blue compared to the same size green spool? This time I’m ready with that new, full spool of blue, but it soon becomes apparent they’re not made by the same manufacturer.
The original small spools of green and blue were made by Amolen. These full spools are made by Sunlu, also the maker of my new printer. Every so often they have a bulk filament sale and I’ll buy four to eight spools at once, basically half price. That explains why I have two 90qt tubs full of filament along with an entire six foot long shelf. Normally I go through this stuff a lot faster than I have lately because of other, higher priority tasks.
No matter how hard I’ve tried to monitor how much filament I’ve used and track how much remains, I never seem to come close. That’s going to change. I search for where the print history lives in OctoPrint, but there isn’t one. There’s a plugin for it though, tracking how much filament has been used, and the running total. I’ll give that a shot. The problem is spools are measured by weight, not length of filament.
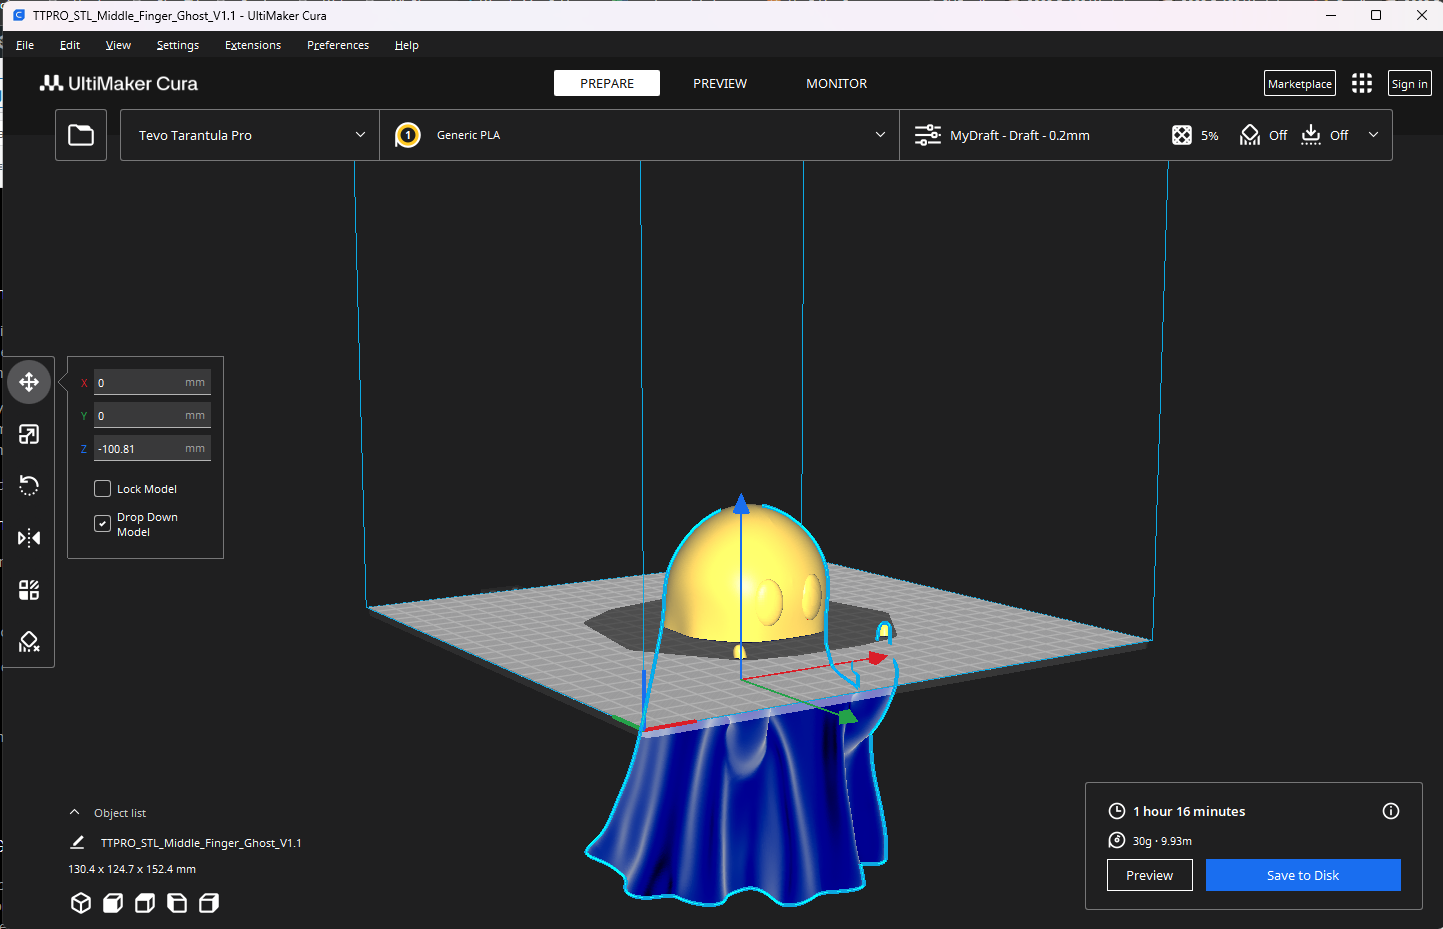
Giving Nate Back His Head
When we were talking about it earlier, Nick told me I could shift the model down in the slicer since it only prints what’s above the build plate. The problem is knowing how far down to shift it. Glad I noted it was ~331⁄32″ at the time. That works out to roughly 100.81mm. At 0.2mm per layer, 504 layers out of 762 printed. Close enough for our needs anyway. It’s sliced and ready to print. Let’s see how well this works.
I loaded the new spool of glow in the dark green and kicked off the print. When it finished, I gathered the “scalp” and “amputated” fingers and “cemented” them on the previously failed print. Not bad. Looks nearly perfect, except for the obvious difference in filament. I kicked off another full sized, homogenous print. For whatever reason, the old Amolen filament seems more transparent than the corresponding Sunlu filament.
While that printed, I put together some four into one harnesses to allow a single battery to power four of the half pints at once. They went more than two days when they each had their own battery. Four from one should at least last all night. Then I got to thinking why not make a USB micro to battery connector to eliminate the need for a battery (and charger) altogether. If it’s always plugged in, it’s always on.
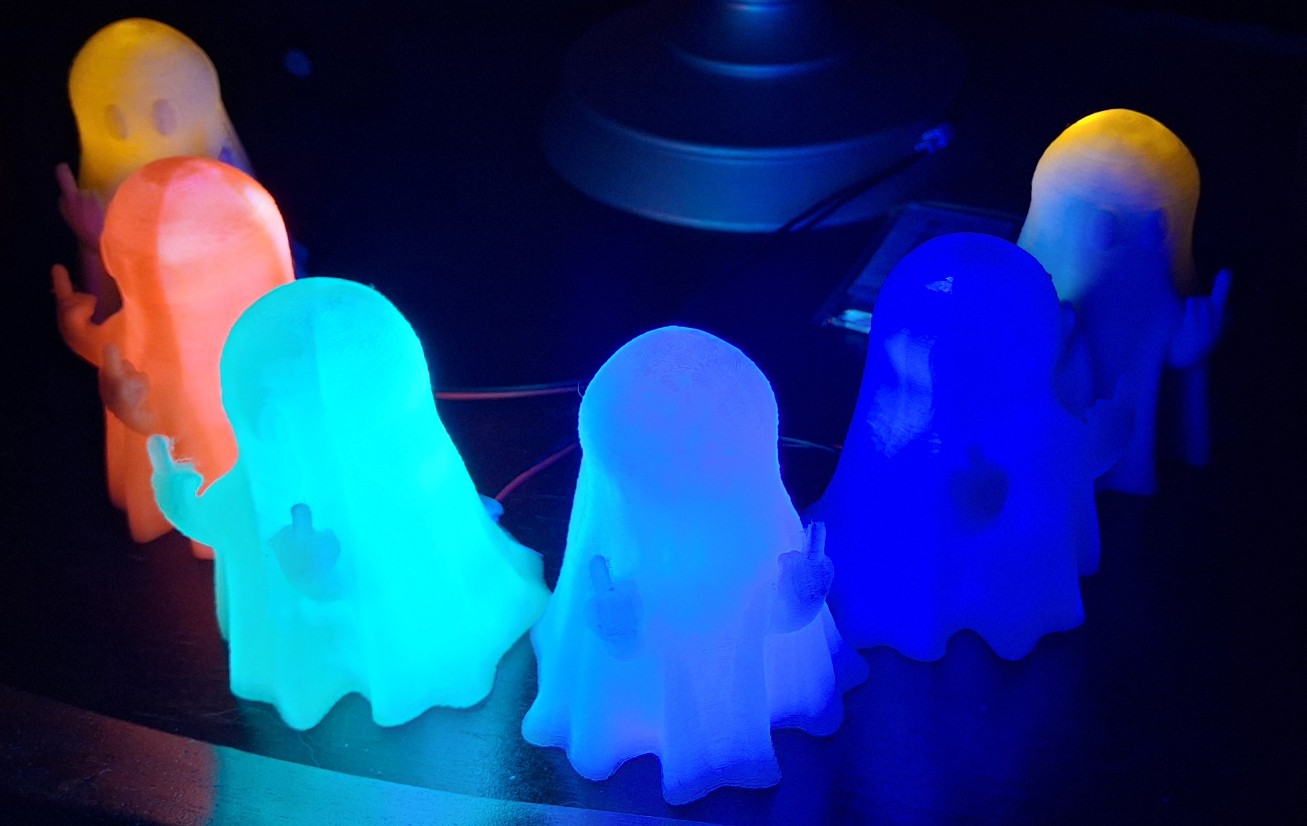
The Groovy Ghoulies
I grouped one of each color of the half pints together then connected them all to one of those four into one harnesses. I set them on the tea table together with the original white half pints and the flickering skull candelabra. I figured the battery would last all night, but it didn’t. I was hoping Ann would see them still glowing in the morning and get a chuckle out of it. I plugged in a fresh battery to show her how they would have looked.
She seemed unamused, but commented on how they’re rainbow colored. I guess they are in a certain sense. Maybe I should have bought the orange and yellow glow in the dark filament too. That got me thinking about how I have orange and yellow flicker LEDs and wondering how they would look inside one of those white ghosts. Only one way to find out. I feel another prototype coming on.
Using the USB “battery eliminator” harness, I plugged the Groovy Ghoulies into a USB power block and they’ll all glow together indefinitely now. Meanwhile, back at the workbench, time to find those flicker LEDs. I looked everywhere I thought they would be but couldn’t find them. Turns out they’re the one place I kept convincing myself they weren’t. Right next to blind me in the blind corner space.
The only color I have in the 3mm size is amber, or rather “orange/yellow” according to the label. Time to drill a hole through the white ghost and assemble what resembles a “probe” with an LED tip. The 470Ω limiting resistor soldered to the anode and protected by clear heat shrink. The remaining lead of the resistor is clipped and soldered to the cathode. The entire thing is inserted into the hole and the power leads soldered to it.
It’s not as impressive as I’d imagined, but the head does flicker like it’s filled with a candle flame. It sort of matches the skull candelabra’s flickering. I’ll do the other one later. I thought I had other colors in the 3mm size to experiment with, but they’re all 5mm. I guess I could drill a bigger hole if I really want to see whether I like the way they look or not. Maybe later. I still have a set of full sized ghoulies to finish.
Round Two – Ad Tedium
The revised edition for the full size ghost will require a PC board, or its equivalent. I had a number of small chunks of Vectorboard™ I found when packing up the corner room and sorting through the electronics. It’s basically brand name 1⁄10″ (2.54mm) hole center perforated board, perf board for short. This is the light colored fiberglass version vs. dark brown epoxy. Add some ¼” copper tape and you have DIY PC boards.
In this case I simply need enough holes for five common positive and five common negative rails for leads to solder to. The ¼” copper tape essentially covers two rows of holes, so using a hacksaw to score and snap the boards into smaller 4×6 hole pieces is just the ticket. If I made them much smaller I wouldn’t be able to handle them without fumbling them. With the copper tape in place the holes are cleared of excess material.
Cutting all those short power leads, stripping, and tinning them is tedious. The eight wires are less than an inch long, four black and four red. After tinning the pads of the LED strips, the short leads are soldered to them. The short, tinned leads from the four LED strips will each occupy holes in the common power rails, one in each rail. Then the battery connector leads are trimmed to length and soldered to the end of both power rails.
The process takes about an hour all told. At least, that’s how long it took me when I recorded doing it. But the end result is well worth it. The wiring is much more compact and the makeshift PC board is small enough to stash inside the opening in the bottom of the ghost. No messy, excessive wiring hanging out the bottom like on the prototype purple ghost. It’s as compact of a design that I can come up with. And it works.

Warning: Math Ahead
There are roughly 3 LEDs every 2″ (50mm), so 9 is ~6″ (150mm). At that rate, the 16 strips we need for the first four full size ghosts quickly eats up that 6.6′ (78″ or 1980mm) strip. In fact, it would totally consume it. We’ll need two strips. It requires roughly 24″ (610mm) per ghost. Add the strips for the half pints to that and it’s almost another full sized ghost. Let’s say 10′ (120″ or 3048mm) of the two strips gets used.
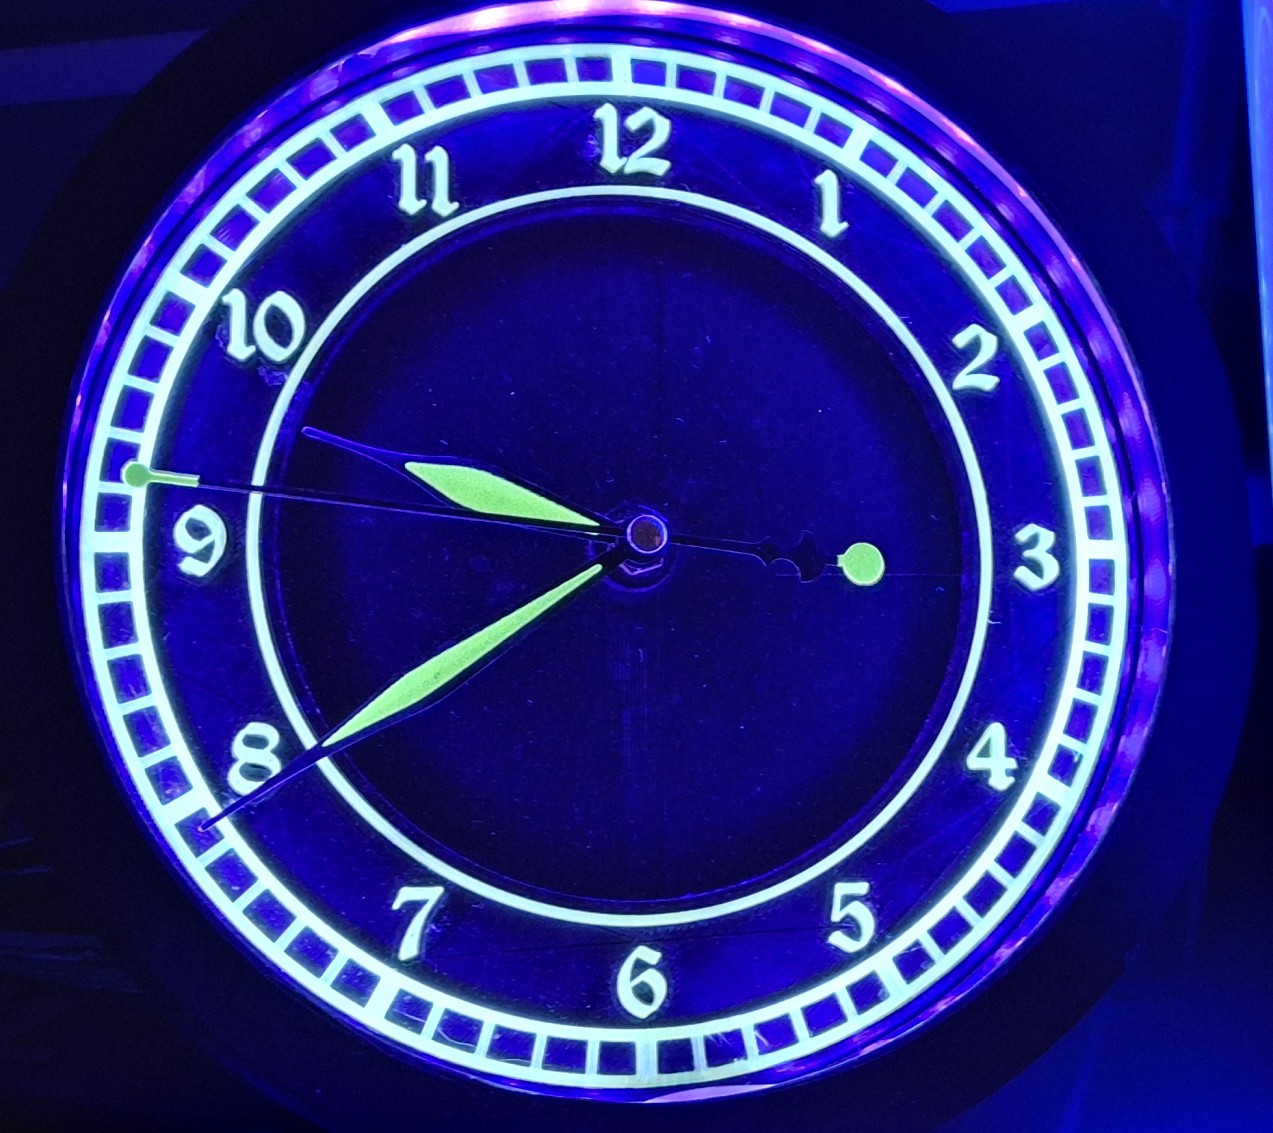
I stopped short of using up all of those first two strips though, taking two of the 9 LED strips from a third spool of LEDs. That left enough to replace the old 12 volt strip on the bedroom “Glow In The Day” clock. There were 40 LEDs on that one. With what’s left on either of the two spools of new UV LEDs there are just enough to fit in the old strip’s place. What a difference! Night and day you ask? These new LEDs glow as bright as the sun!
They’re so bright it’s hard to tell the glow in the dark features are green and not blue. Even the hands are glowing! When the LEDs are turned off, everything continues to glow bright green for quite a while. Perfect. If those features were printed with the Sunlu filament and not the more transparent Amolen it may look even more green. The picture doesn’t do it justice. Even after adjusting the white balance, it looks more blue to the naked eye.
“Glow In The Day”
I printed two of those clocks, the prototype sits out in the garage, while the revised edition still sits on the bedroom nightstand. Both were ESP8266 Arduino controlled. Yet another lighting controller, this time optimized for monochrome LEDs. In this case UV LEDs. For the glowing ghosts project, that decision to use 12 volt LED strips adds extra complexity, namely the boost converter to step up the 5 volt supply for the Arduino to 12 volt for the LEDs.
Three things became readily apparent. First, 40 LEDs draw a significant amount of power, regardless of supply voltage. Each LED draws about 20mA, times 40 is 800mA. The boost converter is rated for 2A, but supplying anywhere near the maximum power to the LED strip, the color changes from the familiar UV purple to nearly bright yellow? Not sure what that’s all about. Could be related to the outdoor silicone coating or the LEDs themselves.
Second, even though the boost converter is rated for 2A, once the brightness gets much over ~40%, it draws so much power from the 5 volt supply that there isn’t enough left for the Arduino itself. At that point, the Arduino promptly resets! This flaw makes it impossible to fully illuminate the 3D printed glow in the dark features, enough so it can’t claim to be the “Glow In The Day” clock anymore.
The third “flaw” is the inability to illuminate the radium painted hands of the clock movement. So not only does it not fully illuminate, the hands don’t glow anywhere near as much as the features on the face. The size of the clock face and LED housing is already at the limit of the print volume at the time with the old printer, making any further modifications to move the LED strip further away from the face and slant toward the hands impossible.
As time passed, the fragile nature of the overly complex boost converter and PWM brightness control circuitry was its downfall. Somehow the USB cable got snagged on something and ripped those parts loose. And because it was on at the time, it ended up shorting out something and destroyed the Arduino itself. Reworking it to run straight from a USB cable, the LEDs are bright enough now, albeit that weird yellowish hue, but the hands still don’t glow.
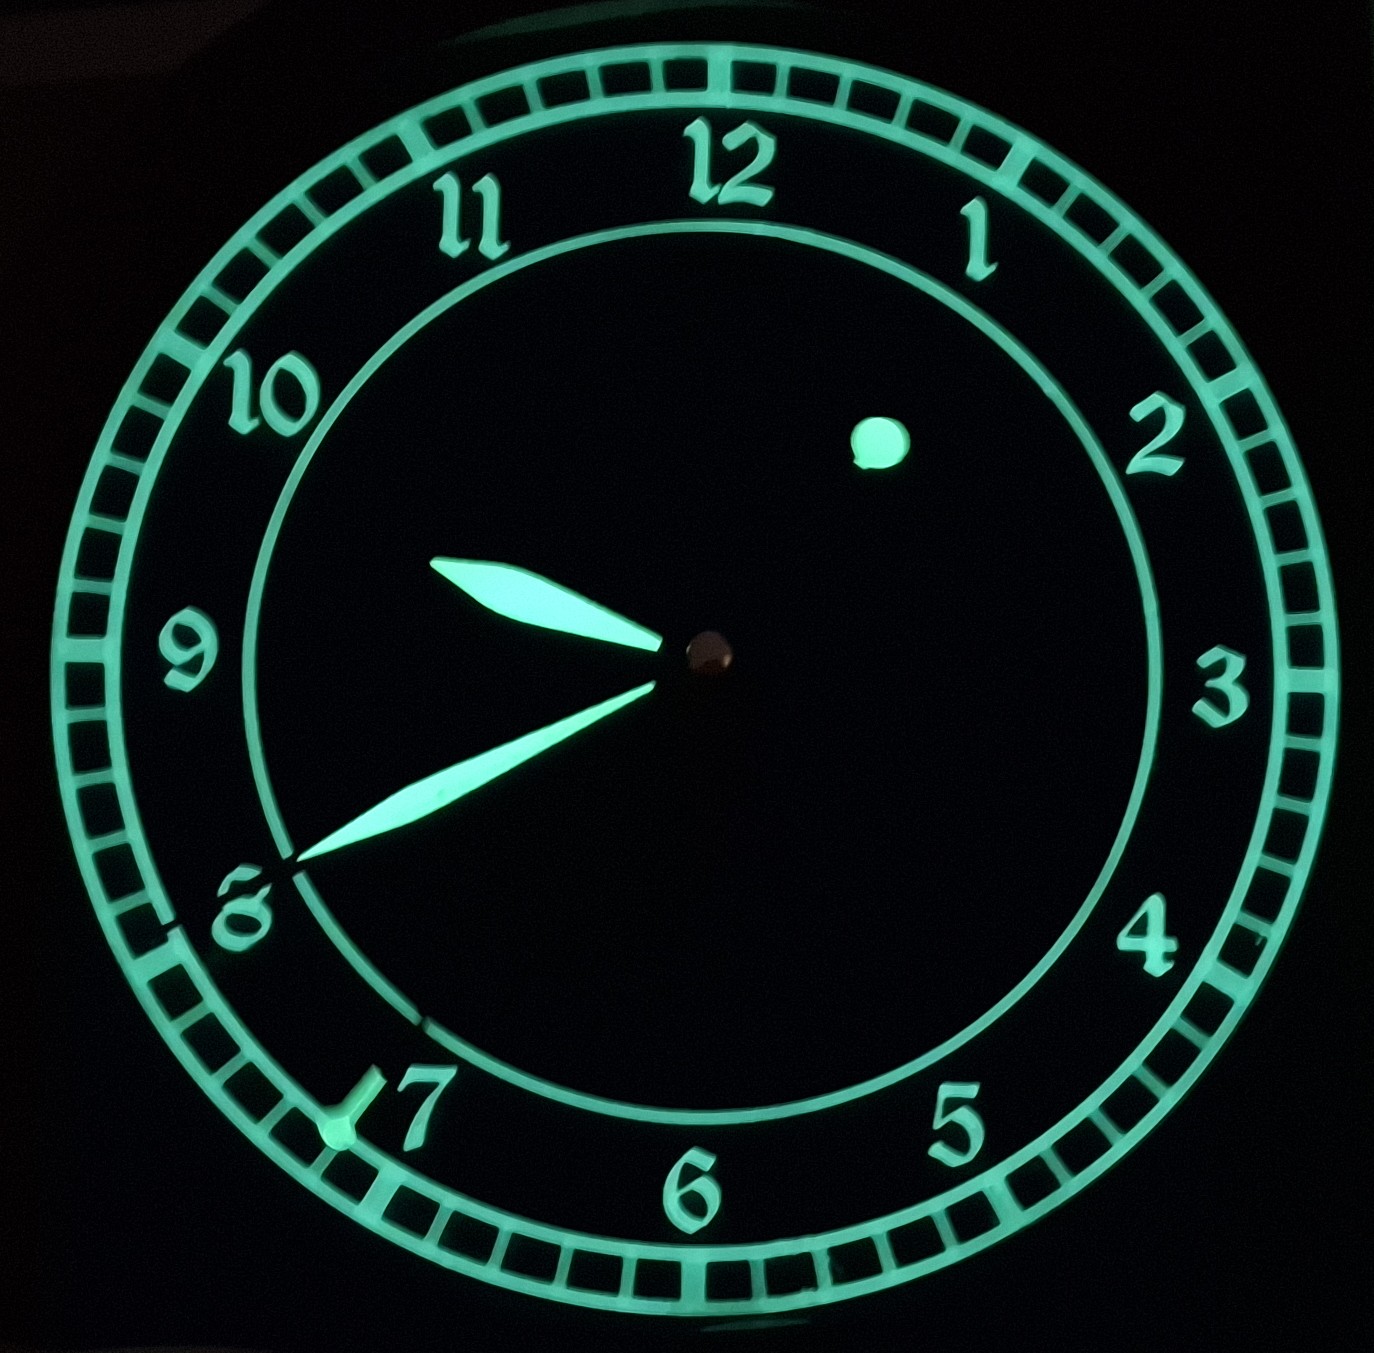
So why does all this matter? I replaced those old 12 volt ones with what was left of one of the new 5 volt UV LED strips. Now it glows so brightly, you can barely tell the glowing features are green! Even the hands glow brightly now! That’s what I was shooting for to begin with! I may resurrect the Arduino monochrome controller with an improved MOSFET driver to greatly reduce the heat from wasted power using the old transistor one.
Glowing Ghosts Everywhere!
There’s a set of half pints glowing on the tea table and another set glowing on my desk in the office. Add to that the full sized set glowing on my workbench and there are glowing ghosts everywhere! Add the string of flicker bulbs and the modified Halloween lighting and I bet Ann thinks I’ve lost it. Gone overboard, off the deep end. Well, maybe just a little. But it’s been a fun project.
The most time consuming part was the full sized ghosts. Everything else went together in minutes. Nowhere near the amount of time it took to put together four full sized ghosts. But they’re just fun to look at and even more fun to watch them continue to glow after turning off the UV LEDs. It’s like when I was a kid and held my luminous Timex watch dial under the living room light then turned it off to watch the hands glows. Only better!
What can I say? I’m just a big kid at heart. And if you never slow down, you never grow old. That’s not quite true in my case though. I am slowing down. I just never let myself grow up. Perhaps a better way to put it is growing old is mandatory, growing up is optional. Whatever the case may be, I had a lot of fun building these glowing ghosts, even the tedious full sized ones! And I learned a few things and finally got a true “Glow In The Day” clock out of it.
If you made it all the way through to the end of this post, thank you. I hope you understand why this is important to me. Even if we didn’t really discuss the Barkyard all that much, other than to explain how we made decoration for Halloween. Hopefully we can leverage what we learned to make some creative neon signs or other effects for the Downtown Marketplace. And hopefully the footage I recorded will make it to our YouTube channel soon!
In any case, leave us a comment to let us know what you think. You’ll need to create a user account to do so, but we don’t use any personal information for marketing (see our privacy policy). You’ll receive a verification email. Reply with the link provided to verify your email address. After that, it’s all automatic. No waiting on moderator approval! No spamming your inbox with useless ADs and Special Offers. None of that nonsense.
Stay tuned…